Homewyse Siding Installation A Complete Guide
Homewyse siding installation is a significant home improvement project that can dramatically enhance your home’s curb appeal and protect it from the elements. This guide walks you through every step, from choosing the right siding material and preparing your home to the installation process itself and long-term maintenance. We’ll cover different siding types, costs, installation techniques, and troubleshooting common problems, equipping you with the knowledge to tackle this project confidently, whether you’re a DIY enthusiast or planning to hire a contractor.
We’ll explore various siding materials – vinyl, wood, fiber cement, and metal – comparing their pros and cons, costs, and suitability for different climates. Learn about essential tools, proper installation methods, and finishing touches for a professional-looking result. We’ll also address crucial aspects like home preparation, safety precautions, and preventative maintenance to ensure your siding lasts for years to come.
Homewyse Siding Installation Cost Analysis
Siding replacement is a significant home improvement project, impacting both curb appeal and property value. Understanding the cost involved is crucial for budgeting and planning. This analysis breaks down the average costs associated with siding installation, considering various factors that influence the final price.
Average Siding Installation Costs by Material
The cost of siding installation varies greatly depending on the material chosen. Vinyl is generally the most affordable option, while wood and fiber cement tend to be more expensive due to material cost and installation complexity. The following table provides a general overview of average costs per square foot. Remember that these are averages, and actual costs can vary widely based on location, project specifics, and contractor fees.
| Material | Average Cost per Square Foot | Cost Range | Factors Influencing Cost |
|---|---|---|---|
| Vinyl | $3-$8 | $2-$12 | Labor costs, complexity of installation (e.g., intricate trim work), and the quality of the vinyl itself. |
| Wood | $7-$15 | $5-$25 | Type of wood (cedar is more expensive than pine), condition of existing structure (requiring additional repairs), and labor intensive installation process. |
| Fiber Cement | $8-$18 | $6-$28 | Durability and longevity, more complex installation requiring specialized tools and expertise, and the higher material cost. |
| Aluminum | $6-$12 | $4-$18 | Lightweight, relatively easy installation, but can be prone to dents and scratches, affecting longevity. |
| Engineered Wood | $9-$16 | $7-$22 | Combines the aesthetics of wood with improved durability and moisture resistance; more expensive than standard wood siding. |
Factors Impacting Siding Installation Costs
Several factors beyond material choice significantly impact the overall cost of a siding installation project. These factors should be carefully considered during the planning phase to ensure accurate budgeting.
These factors include:
- Labor Costs: Labor costs vary regionally and depend on the contractor’s experience and demand. A complex installation with extensive trim work or repairs will naturally increase labor costs.
- Project Size and Complexity: Larger projects and those involving intricate designs or extensive repairs will cost more than smaller, simpler jobs.
- Existing Siding Removal: Removing old siding adds to the overall cost and labor time involved.
- House Features: The number of windows, doors, and other architectural details impacts the time and labor required for installation.
- Permits and Inspections: Permitting fees and inspection costs can add to the project’s total expense.
- Material Quality: Higher-quality materials generally cost more but offer increased durability and longevity.
- Waste Removal: Proper disposal of old siding and construction debris can incur additional fees.
Regional Variations in Siding Installation Costs
Siding installation costs vary significantly across the United States. Factors such as labor rates, material availability, and local regulations all contribute to regional differences. For example, areas with high construction costs, such as major metropolitan areas on the coasts, will generally have higher siding installation costs compared to rural areas in the Midwest. The cost of living and competition among contractors also play a significant role in price fluctuations. It is recommended to obtain multiple quotes from local contractors to accurately assess costs in your specific region.
Siding Installation Methods and Techniques: Homewyse Siding Installation
Installing siding is a crucial aspect of home construction and renovation, impacting both aesthetics and protection. Choosing the right method and materials depends on factors like your home’s style, budget, and climate. Understanding the various techniques is key to a successful and long-lasting installation.
Siding Installation Methods by Material
Different siding materials require specific installation approaches to ensure proper fit, weather resistance, and longevity. Improper installation can lead to leaks, damage, and costly repairs. Here’s a breakdown of common methods:
- Lap Siding (Wood, Vinyl, Fiber Cement): This popular style involves overlapping horizontal boards. Installation typically involves nailing each board to the sheathing, ensuring proper overlap and alignment. For wood, careful attention to spacing and sealing is crucial to prevent moisture damage. Vinyl lap siding often uses a hidden fastening system for a cleaner look. Fiber cement requires more specialized tools and techniques due to its weight and potential for cracking.
- Shingle Siding (Wood, Asphalt, Fiber Cement): Shingles are installed in overlapping rows, starting from the bottom and working upwards. Proper alignment and securing each shingle with nails is essential. Asphalt shingles are relatively easy to install, while wood shingles require more care to prevent splitting and warping. Fiber cement shingles, while durable, are heavier and require more precision.
- Board and Batten Siding (Wood, Fiber Cement): This style uses vertical boards (battens) to cover the seams of wider boards. Installation involves precise measurement and alignment to achieve a clean, rustic look. This method often requires more detailed planning and careful cutting to ensure a professional finish. Fiber cement board and batten requires additional care during handling and cutting due to its brittle nature.
Tools and Equipment for Professional Siding Installation
Having the right tools is crucial for efficient and accurate siding installation. Using the wrong tools can lead to damage to the siding material, delays, and an unprofessional finish. Here’s a list of essential equipment:
- Measuring Tape and Level: Accurate measurements are vital for proper alignment and spacing.
- Circular Saw and Reciprocating Saw: Used for cutting siding materials to size.
- Hammer and Nail Gun: For securing siding to the sheathing. A nail gun significantly speeds up the process.
- Drill and Driver: Needed for pre-drilling holes in some siding materials and for fastening accessories.
- Utility Knife: For trimming and cutting sealant.
- Caulk Gun: For applying sealant around windows, doors, and other openings.
- Safety Glasses and Gloves: Essential for protecting your eyes and hands.
- Ladder and Scaffolding (as needed): For safe access to higher areas of the home.
- J-Channel and Starter Strip: These components provide a clean finish at the edges and corners.
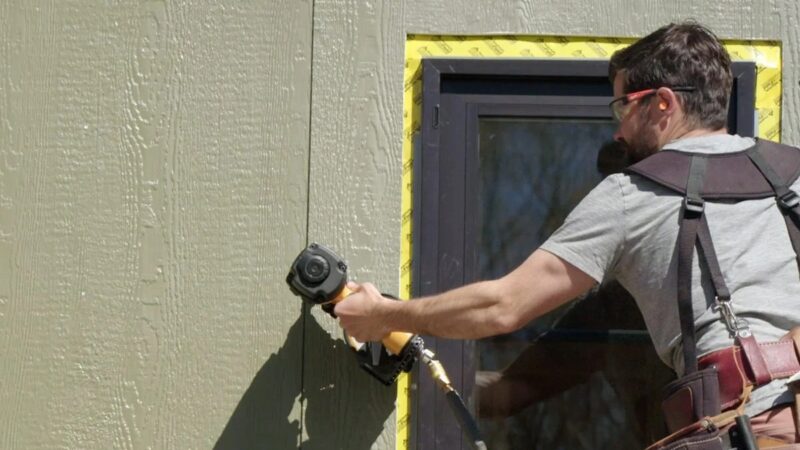
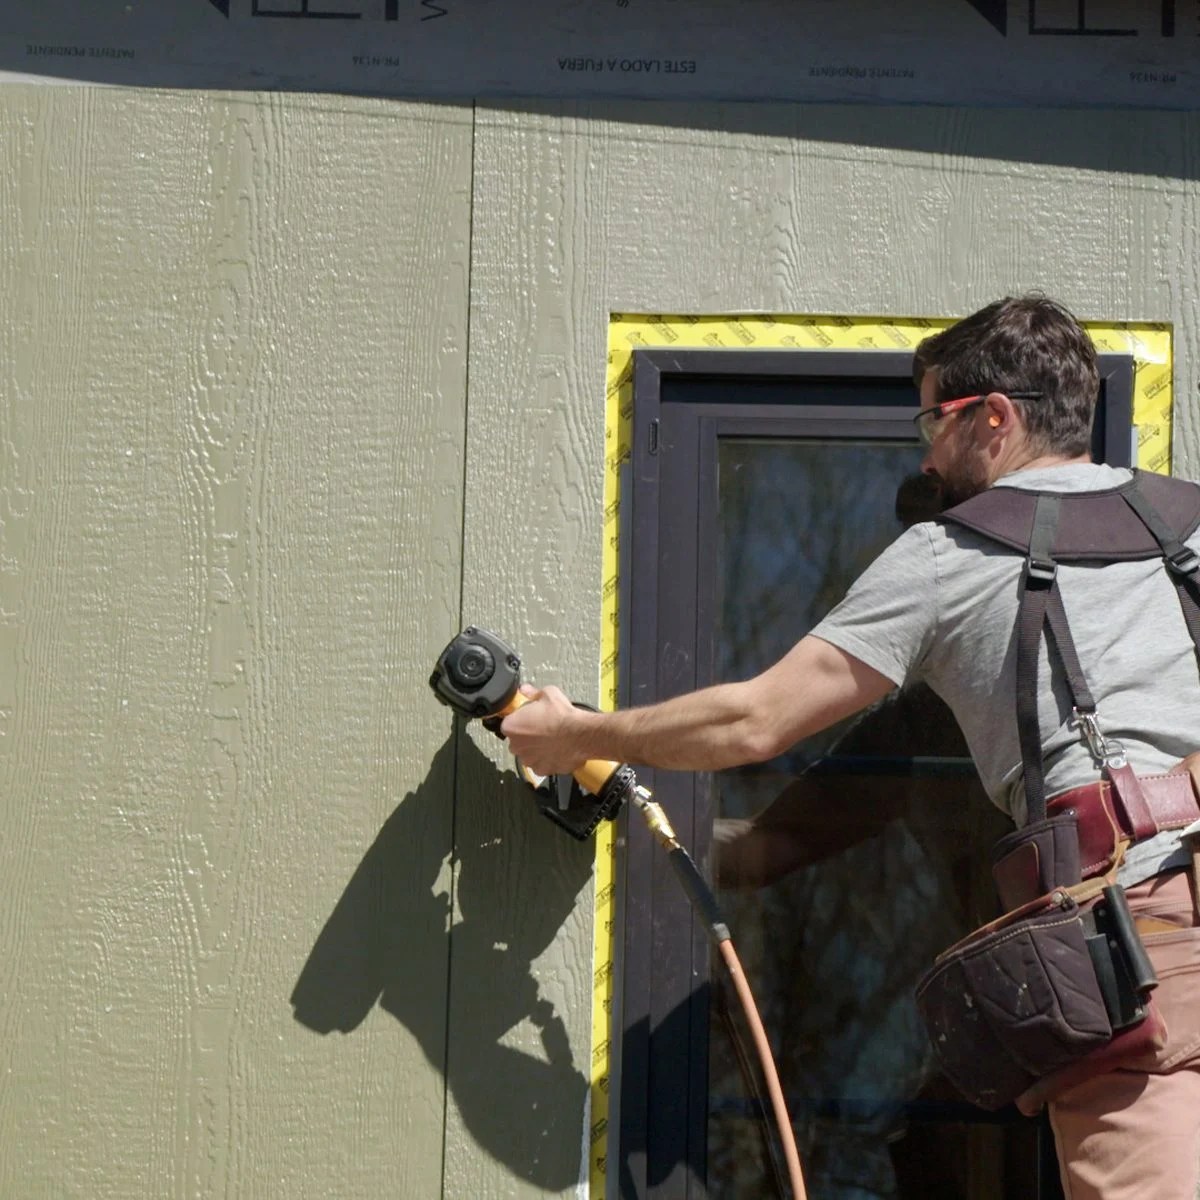
Step-by-Step Guide for Vinyl Siding Installation
Vinyl siding is a popular choice due to its durability, low maintenance, and affordability. Proper installation is key to maximizing its lifespan and aesthetic appeal. Here’s a step-by-step guide:
- Preparation: Inspect the existing wall sheathing for damage and repair any issues. Ensure the sheathing is clean and dry. Plan the layout of the siding, considering windows, doors, and corners.
- Install Starter Strip: Begin at the bottom of the wall, attaching the starter strip to the sheathing. This provides a level base for the first row of siding.
- Install J-Channel: Install J-channel around windows, doors, and corners to provide a neat finish and protect the edges of the siding.
- Install First Row of Siding: Snap the first row of siding into the starter strip, ensuring proper alignment and spacing. Secure it using nails or clips according to the manufacturer’s instructions.
- Install Subsequent Rows: Continue installing rows, overlapping each row according to the manufacturer’s specifications. Ensure proper alignment and use a level to maintain a straight line.
- Install Finishing Pieces: Install finishing pieces, such as trim and corner pieces, to complete the installation. Seal any gaps or joints with caulk.
- Final Inspection: Carefully inspect the completed siding for any gaps, misalignments, or damage. Address any issues before moving on.
Choosing the Right Siding Material
Source: familyhandyman.com
Choosing the right siding material is a crucial decision in any home construction or renovation project. It impacts not only the aesthetic appeal of your home but also its durability, maintenance requirements, energy efficiency, and overall cost. Understanding the advantages and disadvantages of various options will help you make an informed choice that best suits your needs and budget.
Siding Material Comparison
The following table compares common siding materials based on durability, maintenance, cost, and aesthetics. Cost comparisons are relative and can vary widely depending on location, quality, and installation costs.
| Material | Advantages | Disadvantages | Cost Comparison (Relative) |
|---|---|---|---|
| Vinyl | Low maintenance, affordable, variety of colors and styles, durable, resists moisture | Can fade or crack in extreme heat or cold, less durable than other options, may not be as aesthetically pleasing to some | Low |
| Wood | Beautiful aesthetic appeal, natural insulation properties, can be stained or painted, durable when properly maintained | High maintenance (requires regular painting or staining), susceptible to rot, insect damage, and moisture damage, relatively high cost | High |
| Fiber Cement | Durable, fire-resistant, resists moisture and insects, low maintenance, long lifespan | Can be brittle and prone to cracking during installation, more expensive than vinyl, requires professional installation | Medium-High |
| Metal (Aluminum or Steel) | Extremely durable, long lifespan, fire-resistant, low maintenance, resists insects and moisture, energy efficient | Can dent or scratch easily, susceptible to rust (especially steel), can be noisy in hail or rain, relatively high cost | Medium-High |
Siding Material Suitability for Different Climates
The ideal siding material depends heavily on the climate. Consider these recommendations:
For regions with extreme heat:
- Vinyl siding can be prone to warping in intense heat, so it’s important to choose a high-quality, heat-resistant option. Consider lighter colors which reflect heat better.
- Fiber cement and metal are excellent choices for their heat resistance and durability.
For regions with heavy snowfall:
- Fiber cement and metal siding are strong enough to withstand the weight of heavy snow accumulation.
- Vinyl siding can handle snow, but ensure proper installation to prevent damage from ice buildup.
For coastal regions:
- Fiber cement and metal siding are highly resistant to moisture and salt spray, making them ideal choices for coastal environments.
- Vinyl siding can be used, but proper maintenance and high-quality options are crucial to prevent damage.
- Wood siding is generally not recommended in coastal areas due to its susceptibility to rot and moisture damage.
Impact of Siding Material on Home Energy Efficiency
Siding plays a significant role in your home’s energy efficiency. Materials with good insulation properties can help reduce energy costs. For example, wood siding naturally provides some insulation, while metal siding often incorporates features that enhance energy efficiency, such as reflective coatings. Fiber cement, while not inherently insulating, can contribute to energy efficiency by creating a more airtight exterior, reducing drafts and heat loss. The overall impact will also depend on factors like insulation in the walls and proper installation techniques.
Home Preparation and Site Considerations
Getting your home ready for new siding is a crucial step that often gets overlooked. Proper preparation ensures a smooth installation, a longer-lasting result, and prevents costly mistakes down the line. Taking the time to thoroughly prepare your home will save you time, money, and frustration in the long run. This section will cover the key aspects of home and site preparation for successful siding installation.
Preparing your home for new siding involves several key steps, all designed to create a clean, stable, and safe surface for the installation process. These steps range from simple cleaning to more involved repairs, and neglecting them can compromise the final result. A well-prepared surface will result in a more professional-looking and durable installation.
Home Surface Preparation and Old Siding Removal
Before any new siding goes up, the existing exterior needs a thorough assessment and preparation. This often involves removing old siding and addressing any underlying issues. Failure to properly prepare the underlying surface can lead to problems like moisture buildup, uneven installation, and premature siding failure. A methodical approach is key.
- Clean the Exterior Walls: Remove all loose dirt, debris, cobwebs, and any other contaminants from the house’s exterior walls using a pressure washer or stiff brush. Pay close attention to areas where dirt and grime tend to accumulate, such as corners and around windows and doors.
- Inspect and Repair Damaged Areas: Carefully inspect the walls for any damage, such as rotted wood, cracks, or holes. Repair or replace any damaged sections of sheathing, using appropriate materials and techniques. Ensure all repairs are properly sealed and dried before proceeding.
- Remove Old Siding: If you’re replacing existing siding, carefully remove it, taking care not to damage the underlying sheathing. Dispose of the old siding properly, following local regulations. This step may require specialized tools depending on the type of siding being removed.
- Check for and Address Moisture Issues: Inspect for any signs of moisture intrusion, such as water stains or mold. Address any moisture problems before installing the new siding to prevent future damage. This may involve repairs to flashing, caulking, or even structural elements.
Site Preparation and Safety Precautions
Beyond the home itself, proper site preparation is essential for a safe and efficient installation. This involves securing the work area, providing access for materials and equipment, and implementing safety measures to protect both workers and the property. Failing to do so can lead to accidents, delays, and damage to your property.
Key aspects include establishing a clear work zone, ensuring adequate access for equipment and materials, and protecting landscaping and other features from damage. Providing a safe working environment minimizes risks and ensures a smoother installation process.
Home Preparation Checklist
This checklist summarizes the key tasks to ensure your home is ready for siding installation. Reviewing this checklist before the installers arrive will help prevent delays and ensure a smooth process.
- Clear the area around the house of any obstacles, such as furniture, plants, or debris.
- Protect landscaping features with tarps or other protective coverings.
- Ensure easy access to water and power sources for the installation crew.
- Provide a designated area for storing materials and equipment.
- Inform neighbors about the upcoming work and any potential disruptions.
- Confirm that all necessary permits have been obtained.
- Verify that all necessary repairs to the house’s exterior have been completed.
Siding Installation and Finishing Touches
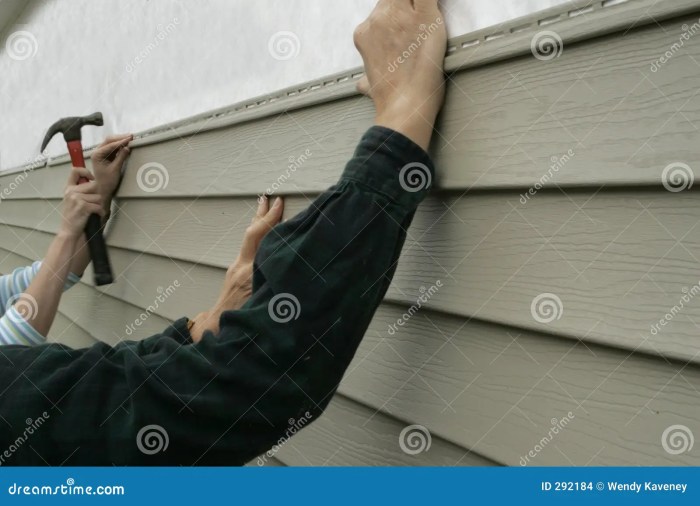
Source: dreamstime.com
Getting your siding installed correctly is crucial for the longevity and aesthetic appeal of your home. This section details the installation process for various siding types, emphasizing proper flashing, caulking, and trim work to ensure a weather-tight and beautiful finish. Remember to always consult the manufacturer’s instructions for your specific siding product.
Proper installation techniques, including careful attention to flashing and caulking, are essential for preventing water damage and ensuring a long-lasting siding installation. Trimming details significantly impact the overall look, creating a professional and polished finish.
Vinyl Siding Installation
Vinyl siding is a popular choice due to its affordability and low maintenance. The following steps Artikel a typical installation:
- Start with the starter strip: This provides a level base for the first row of siding. Make sure it’s perfectly level and aligned.
- Install the first row of siding: Overlap the starter strip, ensuring proper alignment and spacing.
- Continue installing rows: Overlap each subsequent row, ensuring consistent spacing and alignment. Use a level frequently to check for straightness.
- Flashing around windows and doors: Install flashing to prevent water penetration. This is critical for long-term protection. Ensure the flashing overlaps properly and seals tightly against the window or door frame.
- Caulking: Apply a high-quality exterior-grade caulk to seal gaps around windows, doors, and other penetrations. This prevents drafts and water intrusion.
- J-Channel and finishing trim: Install J-channel around corners and windows to provide a clean, finished edge. Use trim pieces to cover the top and bottom edges of the siding.
Fiber Cement Siding Installation
Fiber cement siding offers superior durability and fire resistance compared to vinyl. Installation requires more precision:
- Prepare the sheathing: Ensure the underlying sheathing is smooth, level, and free of imperfections. This is crucial for a flush installation.
- Install starter strips and flashing: Similar to vinyl, start with a starter strip and install flashing around windows and doors. However, due to the heavier weight of fiber cement, extra care should be taken to secure the flashing.
- Install siding panels: Use appropriate fasteners, ensuring proper spacing and alignment. Pre-drilling pilot holes is recommended to prevent cracking.
- Caulk and seal: Apply a high-quality, paintable caulk to seal gaps and joints. Pay close attention to areas where the siding meets other building materials.
- Trim work: Use trim pieces to finish the edges and corners of the siding for a professional appearance. Matching the trim color to the siding will enhance the look.
Wood Siding Installation
Wood siding offers a classic and aesthetically pleasing look, but requires more maintenance. Installation involves:
- Prepare the wood: Ensure the wood is properly treated for weather resistance and is free of any defects. Pre-treating with a sealant will prolong the life of the wood.
- Install furring strips: These provide a space for air circulation behind the siding, which helps to prevent moisture buildup.
- Install the siding: Use appropriate nails or screws, ensuring proper spacing and alignment. Follow the manufacturer’s instructions for lap and spacing requirements.
- Flashing and caulking: Install flashing around windows and doors and caulk all joints and gaps. This is critical to prevent water damage.
- Trim work: Use trim pieces to finish the edges and corners of the siding. Consider adding decorative trim elements to enhance the appearance.
Finishing Touches and Best Practices, Homewyse siding installation
Regardless of the siding type, meticulous finishing touches are essential. Proper caulking is vital to prevent water penetration. Use a high-quality, paintable exterior-grade caulk. For a seamless look, carefully match the caulk color to the siding. Ensure all seams and joints are completely sealed.
Consistent spacing and alignment are key to achieving a professional look. Use a level and measuring tape frequently throughout the installation process. Consider using a chalk line to mark the position of the first row of siding to maintain consistent alignment.
Always follow the manufacturer’s instructions for your specific siding product. This ensures a proper installation and maintains the warranty.
Maintenance and Repair of Siding
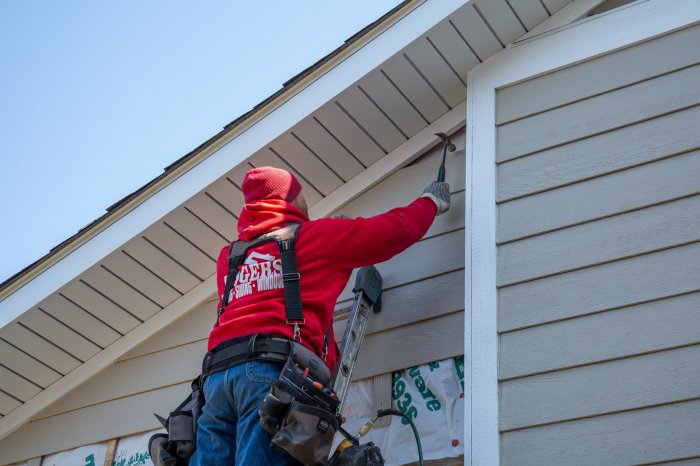
Source: rogersroofing.com
Proper siding maintenance is crucial for extending its lifespan and maintaining your home’s curb appeal. Neglecting regular care can lead to costly repairs down the line, potentially impacting your home’s structural integrity. This section details essential maintenance tasks and troubleshooting common siding issues.
Regular maintenance involves a combination of cleaning, inspection, and minor repairs. Consistent attention will help prevent larger, more expensive problems from developing.
Regular Maintenance Tasks
Regular maintenance keeps your siding looking its best and prevents small problems from becoming big ones. A proactive approach is far more cost-effective than reactive repairs.
- Cleaning: Wash your siding at least once or twice a year, using a garden hose and a soft-bristled brush. For stubborn dirt or mildew, use a solution of mild detergent and water. Always rinse thoroughly to prevent residue buildup. Avoid using high-pressure washers, as they can damage siding.
- Inspection: Regularly inspect your siding for any signs of damage, such as cracks, loose boards, or water damage. Pay close attention to areas prone to moisture buildup, such as around windows and doors.
- Minor Repairs: Address minor repairs promptly. This might involve tightening loose screws, replacing damaged boards, or caulking gaps to prevent water intrusion. For more extensive repairs, consult a professional.
Common Siding Problems and Solutions
Identifying and addressing siding problems early can prevent significant damage and costly repairs. Knowing what to look for is half the battle.
- Cracks: Cracks can be caused by impact, settling, or age. Small cracks can often be repaired with caulk, while larger cracks may require replacing the damaged section of siding. For example, a small crack in vinyl siding can be filled with vinyl caulk matched to the siding color. Larger cracks or splits may require replacing the entire panel.
- Water Damage: Water damage manifests as discoloration, rotting, or swelling. Addressing water intrusion is critical to prevent further damage. This often involves repairing damaged flashing, caulking gaps, or improving drainage around the foundation. For instance, if water is seeping behind the siding near a window, the flashing around the window needs to be inspected and possibly replaced.
- Insect Infestation: Signs of insect infestation include holes, sawdust, or insect activity. Treatment may involve pesticide application or replacing infested sections of siding. For example, if you notice termite activity, contacting a pest control professional is essential before attempting any repairs.
Preventative Maintenance Schedule
A preventative maintenance schedule ensures your siding remains in top condition for years to come. The frequency of tasks varies depending on the siding material and environmental conditions.
| Siding Material | Cleaning | Inspection | Caulking/Minor Repairs |
|---|---|---|---|
| Vinyl | Twice yearly | Annually | As needed |
| Wood | Annually (with cleaning solution) | Semi-annually | As needed; more frequent for older wood |
| Fiber Cement | Annually | Annually | As needed |
| Aluminum | Annually | Annually | As needed |
Summary
Successfully completing a homewyse siding installation project transforms your home’s exterior, boosting its value and aesthetic appeal. By understanding the different materials, methods, and maintenance requirements, you can make informed decisions to achieve a durable, beautiful, and energy-efficient result. Remember to prioritize safety and proper preparation throughout the process. Whether you choose to DIY or hire professionals, this guide provides the essential knowledge to ensure a successful project.
Question Bank
Can I install siding myself?
While DIY is possible for some siding types, particularly vinyl, it requires skill and patience. Complex installations or large areas are best left to professionals.
How long does siding installation take?
The time varies greatly depending on the size of the house, siding material, and complexity of the project. Expect several days to several weeks.
What’s the warranty on siding?
Warranties vary by manufacturer and material. Check the manufacturer’s specifications for details. Proper installation is crucial for warranty validity.
How often should I clean my siding?
Regular cleaning, at least once or twice a year, helps prevent dirt buildup and damage. Use a gentle cleaner and soft brush to avoid scratching.
What are the signs of siding damage?
Look for cracks, warping, discoloration, water stains, or insect infestation. Address these issues promptly to prevent further damage.
Comments are closed.