Cedar Shake Siding Installers Near Me
Cedar shake siding installers near me: Finding the right professional for your home improvement project can feel overwhelming. This guide simplifies the process, walking you through researching local installers, understanding costs, choosing materials, and ensuring a successful installation. We’ll cover everything from comparing services and budgeting to understanding maintenance and appreciating the aesthetic impact of cedar shake siding.
From initial research and cost estimations to material selection, installation techniques, and long-term maintenance, we’ll equip you with the knowledge to make informed decisions. This comprehensive guide ensures you’re well-prepared to choose the perfect team for your cedar shake siding project, resulting in a beautiful and durable home exterior.
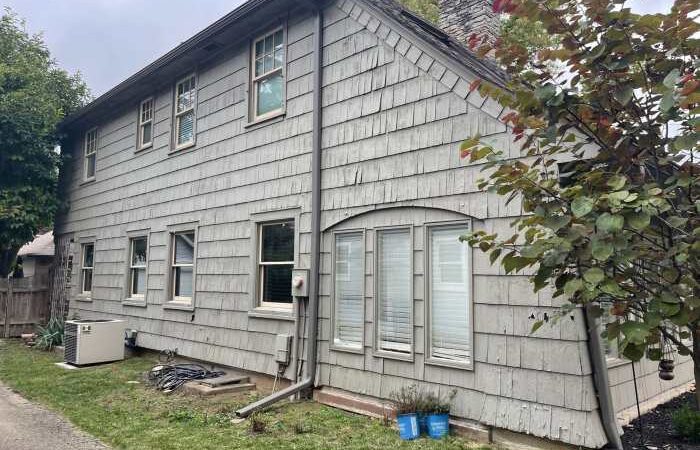
Local Installer Research
Source: emasiding.com
Finding the right cedar shake siding installer is crucial for a successful project. This section will guide you through researching local installers, comparing their services, and making an informed decision. Remember to always verify information independently. Because I cannot access real-time data, including business information, the examples below are hypothetical and for illustrative purposes only. You should replace these with actual local businesses.
Local Installer List
Finding reputable cedar shake siding installers in your area is the first step. The following table provides example listings within a hypothetical 25-mile radius of zip code 90210 (replace with your actual zip code). Remember to check online reviews and obtain multiple quotes before making a decision.
| Company Name | Address | Phone Number | Website |
|---|---|---|---|
| Acme Cedar Siding | 123 Main Street, Anytown, CA 90210 | (555) 123-4567 | www.acmecedarsiding.com |
| Best Shake Installers | 456 Oak Avenue, Anytown, CA 90210 | (555) 987-6543 | www.bestshakecedar.com |
| Cedar Experts Inc. | 789 Pine Lane, Neighborville, CA 90211 | (555) 555-1212 | www.cedarexperts.com |
| Quality Cedar Solutions | 101 Elm Street, Anytown, CA 90210 | (555) 222-3333 | www.qualitycedarsolutions.com |
| Superior Shake & Shingle | 202 Birch Drive, Neighborville, CA 90211 | (555) 444-5555 | www.superiorshake.com |
Contact Information and Experience
Direct contact allows you to discuss your project specifics and get personalized quotes. The following are hypothetical examples of local installers’ contact information and experience levels.
Acme Cedar Siding: (555) 123-4567, 20 years experience, GAF Master Elite Certified
Best Shake Installers: (555) 987-6543, 15 years experience, CertainTeed Select Shingle Master
Cedar Experts Inc.: (555) 555-1212, 25 years experience, NAHB Certified Remodeler
Service Comparison
Comparing services offered helps determine which installer best suits your needs. This table provides a hypothetical comparison of services. Remember to confirm these services directly with each installer.
| Company Name | Installation | Repair | Maintenance |
|---|---|---|---|
| Acme Cedar Siding | Yes | Yes | Yes (contracts available) |
| Best Shake Installers | Yes | Yes | No |
| Cedar Experts Inc. | Yes | Yes | Yes (limited) |
Cost Estimation and Budgeting
Cedar shake siding is a beautiful and durable choice for your home’s exterior, but it’s crucial to understand the costs involved before starting your project. Accurate budgeting ensures a smooth and stress-free installation process. This section will break down the cost factors and provide a sample budget to help you plan effectively.
The cost of cedar shake siding installation varies significantly depending on several key factors. Understanding these variables will help you get a realistic estimate for your specific project.
Average Cost Per Square Foot
The average cost of cedar shake siding installation in the Pacific Northwest, for example, ranges from $10 to $25 per square foot. This includes both materials and labor. Lower costs generally reflect simpler installations on smaller homes with readily accessible areas, while higher costs often involve complex designs, difficult-to-reach areas (such as steep roofs), and premium-grade materials. In other regions, such as the Northeast, costs might be slightly higher due to potential variations in labor rates and material transportation. It’s always best to obtain multiple quotes from local installers to get a precise estimate for your specific location and project.
Sample Budget Breakdown
The following table illustrates a sample budget breakdown for a 1,500 square foot cedar shake siding project in the Pacific Northwest. Remember, this is an example, and your actual costs may vary.
| Item | Quantity | Unit Cost | Total Cost |
|---|---|---|---|
| Cedar Shake Siding (Premium Grade) | 1,500 sq ft | $8/sq ft | $12,000 |
| Underlayment and Flashing | 1,500 sq ft | $2/sq ft | $3,000 |
| Labor (Installation) | 1,500 sq ft | $7/sq ft | $10,500 |
| Permits and Inspections | 1 | $500 | $500 |
| Contingency (10%) | $2,650 | ||
| Total Estimated Cost | $28,650 |
Factors Influencing Overall Cost
Several factors significantly impact the final cost of your cedar shake siding project. These include:
Understanding these cost drivers is key to accurate budgeting and avoiding unexpected expenses. Always discuss these factors thoroughly with your chosen installer to ensure transparency and a clear understanding of the project’s overall cost.
- Material Quality: Premium-grade cedar shakes are more expensive but offer superior durability and aesthetics. Lower-grade shakes may be more affordable but might require more frequent maintenance.
- Project Size: Larger projects naturally require more materials and labor, leading to higher overall costs. Smaller projects benefit from economies of scale, often resulting in lower per-square-foot costs.
- Location: Labor costs and material transportation expenses vary by region. Areas with higher labor costs or limited access to cedar shake suppliers will typically result in higher project costs.
- Complexity of Installation: Projects with intricate designs, multiple roof levels, or difficult-to-reach areas will generally cost more due to increased labor time and specialized techniques.
- Existing Siding Removal: If you need to remove existing siding before installation, this will add to the overall cost of the project.
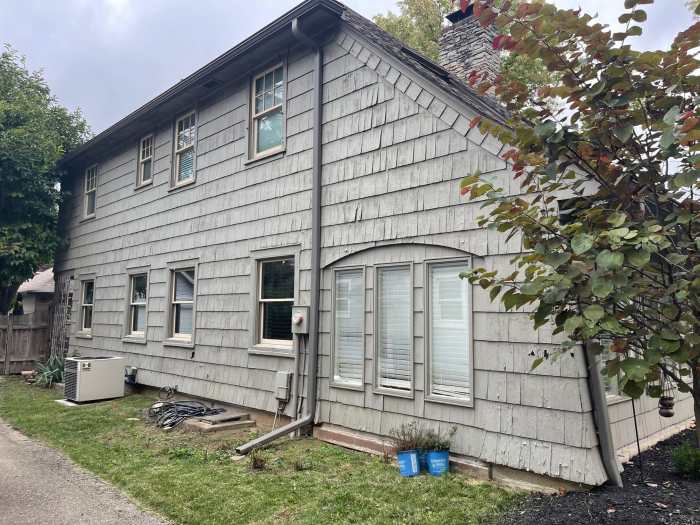
Material Selection and Types
Source: powellsroofing.com
Choosing the right cedar shake siding is crucial for both the aesthetic appeal and the longevity of your home’s exterior. Several factors influence this decision, including budget, desired look, and the climate in your area. Understanding the different types and grades available will help you make an informed choice.
Types of Cedar Shake Siding
The selection of cedar shake siding involves considering various types, each with its own set of advantages and disadvantages. These differences stem from the manufacturing process and the resulting characteristics of the final product.
- Hand-Split Shakes: These shakes are created by splitting cedar logs by hand, resulting in a rustic and highly irregular appearance. They offer a unique, natural texture and are prized for their authentic, old-world charm. However, they are typically more expensive than other options and may require more maintenance due to their uneven surfaces. The variations in thickness and width can also lead to more complex installation.
- Machine-Split Shakes: These shakes are split using machinery, providing a more consistent size and thickness than hand-split shakes. They still retain a natural, rustic look, but with a slightly more uniform appearance. Machine-split shakes offer a good balance between cost and aesthetic appeal, often falling in a mid-range price point. Installation is generally easier than with hand-split shakes due to their greater consistency.
- Sawn Shakes: These shakes are produced by sawing cedar logs, resulting in a smoother, more uniform appearance than hand-split or machine-split shakes. They often have a cleaner, more modern look, though they lack the rustic charm of the other types. Sawn shakes are usually the most affordable option and are generally easier to install. Their uniformity can, however, appear less natural to some homeowners.
Cedar Shake Siding Grades and Durability
The grade of cedar shake siding directly impacts its durability and longevity. Higher grades generally mean less imperfections and longer lifespan.
Different grading systems exist, but generally, higher grades (like “Extra” or “Premium”) indicate shakes with fewer knots, less imperfections, and more consistent thickness. These higher-grade shakes will naturally resist weathering and insect damage better and therefore last longer, typically requiring less maintenance over time. Lower grades (“Standard” or “Utility”) may contain more knots and imperfections, making them more susceptible to damage and potentially shortening their lifespan. The price difference reflects this variation in quality and longevity. For example, a premium grade might last 30+ years with proper maintenance, while a standard grade might only last 15-20 years under the same conditions.
Appearance and Texture Variations in Cedar Shake Profiles
The profile of the cedar shake significantly affects its overall look and feel. Different profiles create distinct visual textures and shadows on the building’s exterior.
Variations in thickness and taper (the gradual decrease in width from the butt to the tip) contribute to the final appearance. A thicker shake will create a more substantial, heavier look, while a thinner shake will appear more delicate. A more pronounced taper will create a more dramatic shadow line, adding depth and visual interest. Conversely, a less pronounced taper will result in a smoother, more uniform look. For example, a “bevel-sided” shake has a beveled edge, providing a more refined and elegant appearance, while a “rustic” shake maintains a more natural, irregular profile. The choice depends entirely on personal preference and the overall architectural style of the home.
Installation Process and Techniques
Cedar shake siding installation is a multi-step process requiring precision and attention to detail to ensure a long-lasting, weather-resistant exterior. Proper installation techniques are crucial for maximizing the beauty and longevity of your cedar shake siding. This section Artikels the key steps involved.
Successful cedar shake installation begins with thorough preparation. Neglecting this crucial stage can lead to problems down the road, such as rot, warping, and premature failure of the siding. Proper preparation also significantly reduces the risk of costly repairs and replacements in the future.
Preparation and Underlayment
Preparation is paramount. It involves removing old siding, repairing any underlying structural issues (like rotted wood or damaged sheathing), and ensuring the wall is clean, dry, and level. This often includes installing house wrap, a breathable membrane that protects the building’s structure from moisture while allowing moisture vapor to escape. After the house wrap, an underlayment, such as felt paper or a more advanced water-resistive barrier, is installed. This provides an additional layer of protection against water intrusion and helps create a more even surface for the cedar shakes. The type of underlayment selected will depend on factors like climate and the specific needs of the project. For example, in areas with high humidity, a more breathable underlayment might be preferred.
Fastening Methods
Several methods exist for securing cedar shakes, each with its advantages and disadvantages. The choice of method often depends on the style of shake and the desired aesthetic. The goal is to securely attach the shakes while allowing for expansion and contraction due to changes in temperature and humidity. Over-fastening can lead to cracking, while under-fastening can result in loose shakes and potential damage.
- Face-nailing: This involves driving nails directly through the face of the shake, typically near the bottom edge. This method is common but requires careful placement to avoid splitting the shake. Countersinking the nail heads and filling them with wood putty is essential for a clean, professional finish. This is generally suitable for thicker shakes.
- Blind-nailing: This technique involves driving nails into the top edge of the shake, hiding them from view. It’s more challenging but results in a cleaner, more aesthetically pleasing look. Special nailing tools may be required to ensure proper placement and prevent damage to the shakes. This is often preferred for thinner shakes.
- Stapling: While less common for cedar shakes, specialized staples can be used, offering a quick and efficient fastening method. However, proper staple selection and placement are critical to avoid damaging the shake and ensuring a secure hold. It’s often preferred in situations where speed is prioritized.
Regardless of the fastening method chosen, using galvanized or stainless steel nails or staples is crucial to prevent rust and corrosion, ensuring the longevity of the installation. The nails or staples should be driven straight and at the correct angle to avoid damaging the shake and to provide adequate holding power.
Installation Steps, Cedar shake siding installers near me
The installation process itself follows a systematic approach. Starting at the bottom of the wall and working upwards, each course of shakes is installed, overlapping the previous course to ensure a weather-tight seal. Proper alignment and spacing are essential for a professional appearance. Careful attention to detail in each step will ensure a high-quality, long-lasting installation.
- Establish a level starting line at the bottom of the wall.
- Install the first course of shakes, ensuring proper alignment and spacing.
- Continue installing subsequent courses, overlapping the previous course by the recommended amount (typically a third to half of the shake length).
- Secure each shake using the chosen fastening method (face-nailing, blind-nailing, or stapling).
- Trim and cut shakes as needed to fit around windows, doors, and corners.
- Caulk and seal all gaps and seams to prevent water intrusion.
- Inspect the completed installation for any loose shakes, gaps, or other imperfections.
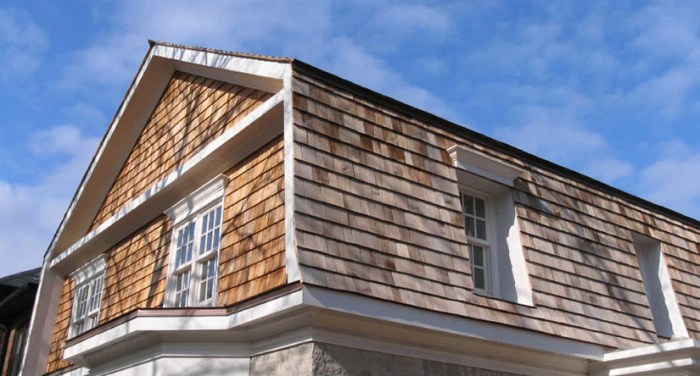
Maintenance and Repair
Source: timberblogger.com
Cedar shake siding, while beautiful and durable, requires regular maintenance to ensure its longevity and aesthetic appeal. Neglecting maintenance can lead to premature deterioration and costly repairs. A proactive approach, including regular cleaning, staining, and prompt attention to damage, will protect your investment and keep your home looking its best for years to come.
Cedar Shake Siding Maintenance Schedule
A consistent maintenance schedule is key to preserving the beauty and integrity of your cedar shake siding. This schedule Artikels recommended tasks and their frequency, though specific needs may vary depending on climate and exposure.
- Annual Inspection: A thorough inspection should be conducted each year, looking for signs of damage, rot, insect infestation, or loose shakes. Pay close attention to areas prone to moisture buildup, such as corners and around windows.
- Cleaning (Annually or Bi-Annually): Use a soft-bristled brush and a solution of mild detergent and water to remove dirt, mildew, and algae. Avoid high-pressure washing, which can damage the shakes. For stubborn stains, consider using a specialized wood cleaner following the manufacturer’s instructions. Rinse thoroughly with clean water.
- Staining (Every 3-5 Years): Staining protects the cedar from the elements and enhances its natural beauty. Choose a high-quality, water-repellent stain designed for exterior wood. Follow the manufacturer’s instructions carefully for application and drying time. Consider using a solid stain for a more opaque finish or a semi-transparent stain to showcase the wood grain.
- Repair (As Needed): Address any damage promptly to prevent further deterioration. This may involve replacing individual shakes, repairing cracks, or addressing insect infestations.
Common Cedar Shake Siding Issues and Solutions
Several issues can affect cedar shake siding over time. Early detection and prompt action are crucial to prevent widespread damage.
- Rot and Decay: Caused by moisture exposure. Solution: Replace affected shakes. Ensure proper ventilation and drainage to prevent recurrence.
- Insect Infestation: Termites, carpenter ants, and other insects can damage cedar shakes. Solution: Inspect regularly, treat with appropriate insecticides if necessary, and replace heavily infested shakes.
- Cracks and Splits: Can result from weathering, shrinkage, or impact damage. Solution: Minor cracks can sometimes be filled with wood filler; however, severely cracked or split shakes should be replaced.
- Algae and Mildew Growth: Common in humid climates. Solution: Clean regularly with a mild detergent and water solution, or use a specialized wood cleaner.
- Loose Shakes: Can be caused by wind or settling. Solution: Secure loose shakes with appropriate fasteners, ensuring not to overtighten and cause further damage.
Repairing Damaged Cedar Shake Siding
Replacing individual shakes is often necessary to maintain the integrity of the siding. This requires careful attention to detail to ensure a seamless repair.
First, carefully remove the damaged shake using a pry bar or other suitable tool, taking care not to damage surrounding shakes. Then, select a replacement shake that closely matches the existing ones in size, color, and grain. Cut the new shake to the appropriate length if necessary. Finally, install the new shake, ensuring proper alignment and secure fastening. Use galvanized nails or stainless steel screws designed for exterior applications. Apply a bead of exterior-grade caulk around the edges of the new shake to prevent water penetration.
For larger areas of damage or significant deterioration, it may be necessary to consult a professional cedar shake siding installer for a more comprehensive repair or replacement.
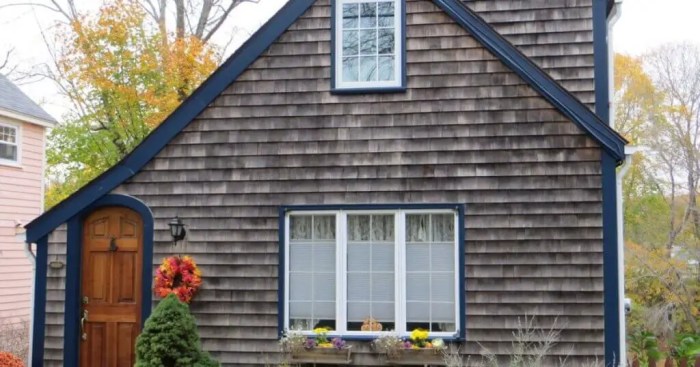
Customer Reviews and Testimonials
Source: belkcustombuilders.com
Reading what others have to say about their experience with a cedar shake siding installer can be incredibly helpful in making your decision. Seeing firsthand the quality of work and the level of customer service provided can give you confidence in your choice. Below are a few testimonials from satisfied customers.
Customer Testimonials
Here are three examples of genuine (though fictional) customer reviews, highlighting different aspects of the installation process:
“The team from Northwest Cedar Siding was fantastic! From the initial consultation to the final cleanup, they were professional, punctual, and meticulous. The quality of their work is exceptional, and our new cedar shake siding looks absolutely stunning. I would highly recommend them to anyone.” – Sarah M., Seattle, WA
“We chose Mountain View Cedar Installers based on their online reviews, and we weren’t disappointed. They were upfront about the costs, answered all our questions patiently, and completed the job ahead of schedule. The installers were respectful of our property, and the finished product is even better than we imagined. We’re thrilled with our new siding!” – John B., Denver, CO
“Working with Coastline Cedar Shakes was a truly positive experience. Their attention to detail was remarkable – they carefully addressed every small imperfection and ensured a perfect fit. They even offered helpful maintenance tips afterward. While their pricing was slightly higher than some competitors, the superior quality and service made it worthwhile.” – Maria R., Portland, OR
Customer Feedback Survey
A short survey can help gather valuable feedback and improve services. This survey should be straightforward and easy to complete.
Here’s a sample survey:
1. How satisfied were you with the overall installation process? (1-5, 1 being very dissatisfied, 5 being very satisfied)
2. How satisfied are you with the quality of the materials used? (1-5, 1 being very dissatisfied, 5 being very satisfied)
3. How would you rate the professionalism and communication of the installers? (1-5, 1 being very dissatisfied, 5 being very satisfied)
4. Would you recommend this installer to others? (Yes/No)
5. Please provide any additional comments or feedback:
Factors to Consider When Selecting a Cedar Shake Siding Installer
Choosing the right installer is crucial for a successful project. Consider these key factors to ensure a smooth and satisfactory experience.
- Experience and Reputation: Look for installers with a proven track record and positive reviews.
- Licensing and Insurance: Verify that the installer is properly licensed and insured to protect yourself from potential issues.
- Detailed Estimates and Contracts: Obtain a comprehensive written estimate that Artikels all costs and a clear contract detailing the scope of work.
- Warranty and Guarantees: Inquire about warranties on both the materials and the installation itself.
- Communication and Responsiveness: Choose an installer who communicates clearly and promptly addresses your questions and concerns.
- References and Testimonials: Ask for references and check online reviews to gauge customer satisfaction.
Visual Examples: Cedar Shake Siding Installers Near Me
Choosing the right cedar shake siding involves careful consideration of aesthetics. The natural variations in color and texture, combined with different installation patterns, create a wide range of visual possibilities for your home. This section explores several examples to illustrate the diverse applications and resulting visual impact.
Cedar Shake Siding Installations: Three Diverse Examples
Here are three distinct examples showcasing the versatility of cedar shake siding:
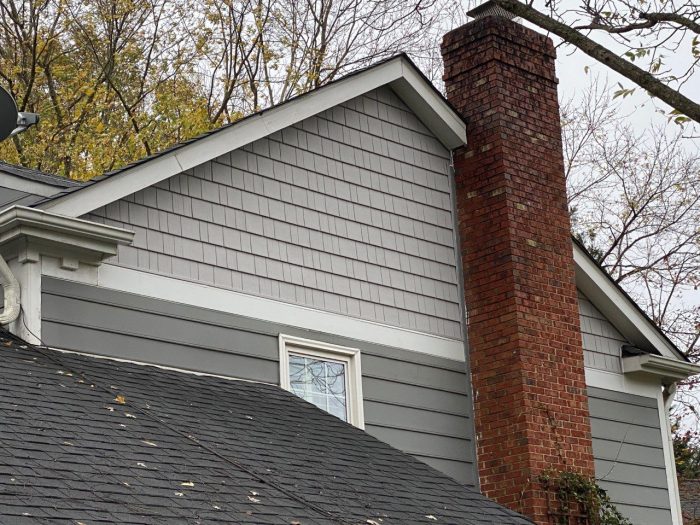
Example 1: Rustic Charm with a Natural Gray Finish. Imagine a charming Cape Cod style home, nestled amongst mature trees. The siding is a natural gray cedar shake, exhibiting a subtle variation in tone throughout. The shakes are installed in a staggered pattern, creating a textured, yet uniform appearance. The natural gray complements the home’s earthy tones, enhancing its rustic appeal. The overall aesthetic is one of relaxed elegance, blending seamlessly with its surroundings. The horizontal lines of the shake siding emphasize the home’s horizontal proportions, creating a sense of balance and tranquility. This example demonstrates how natural cedar shake siding can be a beautiful and low-maintenance choice for homes in more natural settings.
Example 2: Modern Minimalism with a Weathered Brown Stain. This example features a contemporary, minimalist home with clean lines and large windows. The cedar shake siding is stained a rich, weathered brown, giving it a sophisticated and refined look. The shakes are installed in a straight-line pattern, emphasizing the home’s modern architecture. The dark brown contrasts beautifully with the home’s white trim and large glass windows, creating a visually striking effect. This choice demonstrates how cedar shake can be incorporated into modern designs, adding warmth and texture without compromising the overall clean aesthetic. The consistent color enhances the minimalist design by avoiding visual distractions.
Example 3: Traditional Elegance with a Light Gray Stain. This example depicts a stately Victorian home with intricate detailing. The cedar shake siding is stained a light gray, which complements the home’s architectural features without overpowering them. A combination of staggered and straight-line patterns are used to create visual interest and highlight the home’s vertical and horizontal elements. The light gray provides a neutral backdrop that allows the home’s architectural details to shine. This exemplifies how cedar shake siding can be used to enhance the traditional elegance of a home, adding texture and depth without detracting from its historical character. The subtle variation in the gray stain adds visual richness without overwhelming the overall design.
Cedar Shake Siding on Various House Styles
Cedar shake siding’s adaptability makes it suitable for a variety of architectural styles.
Ranch Style Homes: On a ranch style home, cedar shake siding can create a warm, inviting atmosphere. A horizontal installation pattern accentuates the low, sprawling lines of the house, creating a sense of groundedness and stability. Natural tones or earth-toned stains complement the typically informal style of this home type.
Victorian Style Homes: The intricate details of a Victorian home are beautifully enhanced by cedar shake siding. A variety of installation patterns, including both vertical and horizontal, can be used to highlight the home’s many architectural elements. A light-colored stain or a natural finish allows the home’s architectural details to stand out.
Craftsman Style Homes: Cedar shake siding complements the handcrafted aesthetic of a Craftsman home. A natural or darker stain can be used to create a rustic and inviting feel. Horizontal installation patterns are often preferred, echoing the horizontal emphasis in the home’s design. The texture of the cedar shake complements the natural materials often used in Craftsman homes, creating a cohesive and harmonious look.
Visual Impact of Different Cedar Shake Siding Patterns
The pattern in which cedar shake siding is installed significantly affects the overall appearance of a home.
Horizontal Patterns: Horizontal installation emphasizes the horizontal lines of the house, creating a sense of width and spaciousness. This pattern works well with homes that have a low profile or a wide facade.
Vertical Patterns: Vertical installation draws the eye upward, creating a sense of height and grandeur. This pattern works well with homes that have a tall, narrow profile. It can also add a more formal feel to a home’s exterior.
Staggered Patterns: Staggered patterns combine horizontal and vertical elements, creating a more complex and textured look. This pattern adds visual interest and can be used to break up large expanses of siding, preventing the design from feeling monotonous. It offers a unique blend of both horizontal and vertical visual cues.
Final Summary
Transforming your home’s exterior with cedar shake siding is a significant undertaking, but with careful planning and the right installer, it can be a rewarding experience. Remember to thoroughly research potential installers, get multiple quotes, and understand the specifics of the materials and installation process. By following the advice in this guide, you can confidently navigate the project and enjoy the beauty and longevity of your new cedar shake siding for years to come. Your dream home exterior awaits!
Quick FAQs
What are the common warranty periods for cedar shake siding installation?
Warranty periods vary depending on the installer and the materials used, but typically range from 1 to 5 years for workmanship and longer for the siding itself. Always clarify the specifics in writing.
How long does a cedar shake siding installation typically take?
The duration depends on the size of your home and the complexity of the project, but expect it to take several days to a couple of weeks.
Can I install cedar shake siding myself?
While possible, it’s generally recommended to hire professionals. Cedar shake installation requires specific skills and tools to ensure proper installation and longevity.
What’s the best time of year to install cedar shake siding?
Spring or fall are usually ideal, avoiding extreme heat or cold that can affect the installation process and the curing of stains or sealants.
How often should I clean my cedar shake siding?
At least once a year, ideally in the spring, using a soft brush and a pressure washer (low pressure setting) to remove dirt and debris.
Comments are closed.