Repairing Cedar Siding A DIY Guide

Repairing cedar siding, a beautiful yet delicate material, requires understanding its vulnerabilities. Cedar, while naturally resistant, is susceptible to rot, warping, cracking, and insect infestations, often due to weather exposure, age, or insufficient maintenance. This guide will walk you through identifying damage, selecting the right repair techniques, and ultimately restoring your cedar siding to its former glory. We’ll cover everything from patching small cracks to replacing entire sections, ensuring a lasting repair.
From recognizing the subtle signs of rot to mastering the art of seamless wood filler application, we’ll provide clear, step-by-step instructions, complete with practical tips and tricks. Whether you’re a seasoned DIY enthusiast or a first-timer tackling a home improvement project, this guide will empower you to tackle cedar siding repair with confidence and achieve professional-looking results.
Understanding Cedar Siding Damage
Cedar siding, while beautiful and durable, isn’t immune to damage. Understanding the common types of damage and their causes is crucial for effective repair. This will help you accurately assess the extent of the problem and plan your repairs accordingly. Ignoring damage can lead to more extensive and costly repairs down the line.
Common Types of Cedar Siding Damage
Several factors contribute to the deterioration of cedar siding. These factors interact, often accelerating the damage process. Recognizing these different types of damage is the first step towards successful repair.
- Rot: Caused by moisture exposure, rot manifests as soft, spongy wood, often discolored (dark brown or black). It can weaken the siding significantly, making it prone to further damage.
- Warping: Changes in moisture content cause cedar to expand and contract, leading to warping or cupping. This results in uneven surfaces and gaps between siding boards.
- Cracking: Cracks can appear due to age, weathering, or impact damage. These cracks can be superficial or penetrate deeply into the wood, compromising its structural integrity.
- Insect Infestation: Termites, carpenter ants, and other insects can bore into cedar siding, causing significant structural damage. Evidence includes small holes, frass (insect droppings), and tunnels within the wood.
Factors Contributing to Cedar Siding Damage
The lifespan and condition of your cedar siding depend heavily on various environmental and maintenance factors. Understanding these factors allows for proactive preventative measures.
- Weather: Exposure to sun, rain, snow, and extreme temperatures causes significant wear and tear. Prolonged moisture exposure is a major contributor to rot and warping.
- Age: Even with proper maintenance, cedar siding will degrade over time. Older siding is more susceptible to damage from weathering and insect infestation.
- Poor Maintenance: Neglecting regular cleaning, painting, or staining allows moisture to penetrate and accelerates the deterioration process. Failing to address minor damage promptly can lead to larger problems.
Visual Indicators of Cedar Siding Damage
Visual inspection is crucial for identifying the type and extent of damage. Knowing what to look for allows for timely intervention and prevents minor issues from escalating.
- Rot: Look for soft, spongy areas, discoloration (dark brown or black), and a crumbling texture. A screwdriver can easily penetrate rotten wood.
- Warping: Observe uneven surfaces, gaps between siding boards, and boards that are significantly bowed or cupped.
- Cracking: Inspect for cracks of varying sizes and depths. Check for cracks that run the length of the board, indicating significant stress.
- Insect Infestation: Look for small holes, sawdust-like frass (insect droppings), and tunnels in the wood. Listen for sounds of insect activity within the walls.
Cedar Siding Damage Assessment Checklist
A systematic assessment ensures no area is overlooked. This checklist provides a structured approach to evaluating the overall condition of your cedar siding.
- Inspect all sides of the house, paying close attention to areas prone to moisture accumulation (e.g., ground level, corners).
- Check for rot, warping, cracking, and insect infestation using the visual indicators described above.
- Note the location and extent of damage for each type of damage identified.
- Photograph damaged areas for documentation and to aid in planning repairs.
- Consider the age of the siding and its overall condition when assessing the extent of repairs needed.
Repairing Rotted Cedar Siding
Replacing rotted cedar siding is a common home repair project that can significantly improve your home’s curb appeal and protect it from further damage. This process requires careful attention to detail to ensure a long-lasting and aesthetically pleasing result. Properly repairing rotted areas will prevent water intrusion and maintain the structural integrity of your home’s exterior.
Removing Rotted Cedar Siding Sections
Removing rotted sections requires patience and the right tools. Start by assessing the extent of the damage. Often, rot spreads beyond what’s immediately visible. It’s crucial to remove all affected wood to prevent the problem from recurring. Use a pry bar and hammer to carefully remove the damaged siding, working from the bottom up. Be mindful of not damaging surrounding sections. Wear safety glasses to protect your eyes from flying debris. For stubborn areas, a reciprocating saw with a fine-tooth blade can be helpful, but use caution to avoid cutting into undamaged wood.
Replacing Rotted Sections with New Cedar Siding
Once the rot is removed, you’ll need to replace the damaged sections with new cedar siding. Measure the area carefully to determine the size of the replacement pieces. It’s best to purchase slightly oversized pieces to allow for trimming and adjustments. When installing the new siding, ensure proper overlap with adjacent pieces, maintaining consistent spacing and alignment. Use galvanized nails or exterior-grade screws to secure the new siding, ensuring they are countersunk and properly covered with wood filler later.
Wood Fillers for Minor Rot Repair
For minor rot damage, wood filler can be a useful tool. Several types exist, each with its own strengths. Epoxy wood filler is excellent for filling larger gaps and provides strong bonding. Two-part epoxy requires precise mixing for proper curing. Wood putty is a more readily available option for smaller imperfections, offering ease of application and sanding. Choose a filler that closely matches the color of your cedar siding. Always follow the manufacturer’s instructions for application and drying time.
Ensuring a Seamless Transition
Achieving a seamless transition between old and new siding requires careful attention to detail. Properly matching the wood grain and color is key. Sand the edges of both the new and old siding to create a smooth surface. Apply wood filler to any gaps or imperfections. After the filler dries, sand it smooth. Finally, apply a high-quality exterior-grade paint or stain to match the existing siding, blending the new section seamlessly with the surrounding area. Multiple coats may be necessary for complete coverage and durability.
Step-by-Step Guide to Replacing a Rotted Cedar Siding Section
This guide assumes basic carpentry skills and appropriate safety precautions.
| Step | Description |
|---|---|
| 1. Assessment | Carefully examine the rotted area, determining its full extent. This often requires probing with a screwdriver or similar tool to check for hidden damage. A visual inspection alone might underestimate the problem. |
| 2. Removal | Using a pry bar and hammer, carefully remove the rotted siding section. Start at the bottom and work upwards, avoiding damage to surrounding boards. A reciprocating saw might be necessary for stubborn sections; always use caution. |
| 3. Preparation | Clean the area thoroughly, removing any remaining debris or loose wood fibers. Ensure the surrounding area is structurally sound. |
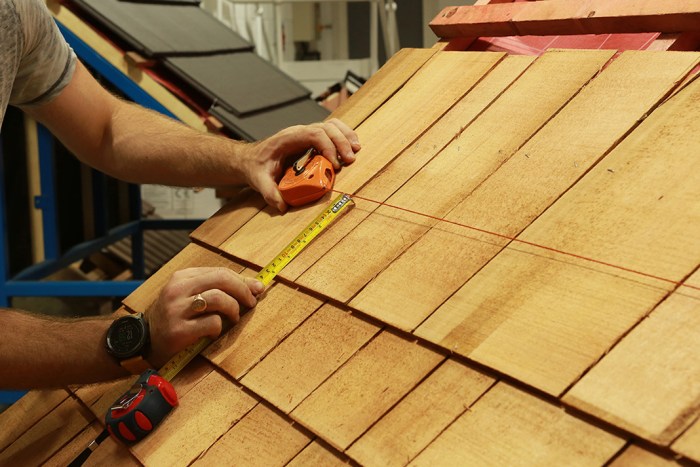
| 4. Measurement & Cutting | Measure the area to be replaced accurately. Cut a replacement piece of cedar siding slightly larger than the measured area to allow for trimming and fitting. |
| 5. Installation | Position the new cedar siding, ensuring proper overlap with adjacent pieces. Secure it using galvanized nails or exterior-grade screws, countersinking them slightly. |
| 6. Filling & Sanding | Apply wood filler to any gaps or imperfections between the new and old siding. Allow it to dry completely, then sand smooth to create a seamless transition. |
| 7. Finishing | Apply exterior-grade paint or stain to match the existing siding. Multiple coats may be necessary for a uniform finish. Allow ample drying time between coats. |
Repairing Warped or Cracked Cedar Siding
Warped and cracked cedar siding is a common problem, often caused by fluctuating humidity and temperature. Fortunately, many instances can be successfully repaired with some patience and the right techniques. Addressing these issues promptly prevents further damage and maintains the aesthetic appeal of your home’s exterior.
Straightening Slightly Warped Cedar Siding
Slight warping can sometimes be corrected by gently manipulating the wood back into place. This is most effective on smaller areas and with siding that isn’t severely damaged. Start by carefully assessing the warp. If the warp is minor, you may be able to gently coax the wood back into alignment using your hands. For stubborn areas, a combination of carefully applied moisture (using a damp sponge, never soaking the wood) and gentle pressure can help. Remember, the goal is to gradually reposition the wood; avoid forceful actions that could cause further cracking or breakage.
Repairing Cracks in Cedar Siding with Wood Filler and Caulk
Cracks in cedar siding require a two-pronged approach: filling the crack and sealing it against the elements. Wood filler is ideal for larger cracks, while caulk is best for smaller gaps and sealing joints.
Wood Filler Selection and Application
Different wood fillers offer varying properties. Epoxy wood fillers are strong and durable, suitable for larger, structural cracks. However, they can be more challenging to work with and require precise mixing. Wood putty is easier to apply and sand, making it a good choice for smaller cracks and cosmetic repairs. Always choose a filler that closely matches the color of your cedar siding. Once the filler is applied, allow it to fully cure according to the manufacturer’s instructions before sanding smooth.
Caulk Application for Crack Sealing
Proper caulking is crucial to prevent moisture penetration. Here’s how to apply it correctly:
- Clean the crack thoroughly, removing any loose debris or old caulk.
- Apply a bead of high-quality exterior-grade caulk to the crack, ensuring complete coverage.
- Use a caulking tool to smooth the caulk, creating a neat and even finish.
- Allow the caulk to cure completely before painting or staining.
Using Clamps and Weights to Address Warping, Repairing cedar siding
For more significant warping, clamps and weights can be employed. This method involves strategically clamping the warped siding to a straight board or support, applying gentle but consistent pressure to gradually realign the wood. Weights can augment the clamping pressure, especially over longer periods. This technique requires patience and careful monitoring to prevent damage to the siding. The weight and clamping pressure should be adjusted as needed, and the process may take several hours or even days for noticeable results. Always ensure the clamps and weights are evenly distributed to avoid creating new stress points. It’s crucial to use soft materials between the clamps and the wood to prevent marking or damage.
Addressing Insect Infestation in Cedar Siding
Source: prosuperiorconstruction.com
Cedar siding, while beautiful and durable, is susceptible to insect infestation. Various insects can bore into the wood, causing structural damage and compromising the aesthetic appeal of your home. Early detection and appropriate treatment are crucial to prevent extensive damage and costly repairs.
Common Insects Infesting Cedar Siding
Several insects target cedar siding, each leaving its own distinctive mark. Carpenter ants, termites, powderpost beetles, and wood borers are among the most prevalent culprits. Carpenter ants, for example, don’t actually eat the wood but excavate tunnels within it, weakening the structure. Termites, on the other hand, consume the wood itself, leading to significant damage. Powderpost beetles create small, round exit holes, while wood borers create larger, more irregular holes. Identifying the specific insect is vital for effective treatment.
Signs of Insect Infestation in Cedar Siding
Recognizing the signs of insect infestation is the first step in addressing the problem. Look for telltale signs such as small, round holes (powderpost beetles), larger, irregular holes (wood borers), frass (insect droppings – fine sawdust-like material), mud tubes (termites), or the presence of the insects themselves. Listen for hollow sounds when tapping on suspect areas; this could indicate internal damage. Regular inspections, especially in areas with moisture accumulation, are vital for early detection. For example, a consistently damp area near a downspout might attract termites.
Treating Insect Infestation
Treatment methods vary depending on the type and extent of the infestation. For minor infestations, localized treatment with insecticidal sprays or dusts specifically designed for wood-boring insects might suffice. Always follow the manufacturer’s instructions carefully. For severe infestations, professional pest control is often necessary. They can accurately identify the insect, assess the extent of the damage, and apply appropriate treatments, potentially including fumigation or targeted injections. In some cases, replacement of severely damaged sections of siding may be unavoidable.
Preventative Measures to Avoid Future Infestations
Prevention is always better than cure. Regularly inspect your cedar siding for any signs of insect activity. Maintain good ventilation around the house to reduce moisture accumulation, a major attractant for insects. Properly seal any cracks or gaps in the siding to prevent insects from entering. Keep woodpiles and other sources of wood away from the house. Consider using insect-repellent wood treatments during the construction or repair process, following all safety guidelines and manufacturer’s instructions.
Preventative Maintenance Schedule for Cedar Siding
A regular maintenance schedule is crucial for preventing insect problems.
- Spring Inspection: Thoroughly inspect all siding for any signs of damage or insect activity. Pay close attention to areas prone to moisture.
- Summer Treatment (if needed): Apply insecticidal treatments to any affected areas, following product instructions carefully.
- Fall Clean-up: Remove leaves, debris, and other organic matter from around the foundation to reduce insect habitat.
- Winter Check: Conduct a brief inspection to ensure no new damage has occurred during the colder months.
Following this schedule will help you identify and address any potential problems early, minimizing the risk of significant damage and costly repairs. Remember that prompt action is key to effective pest control.
Painting and Staining Repaired Cedar Siding
Protecting your repaired cedar siding with a fresh coat of paint or stain is crucial for its longevity and aesthetic appeal. Proper preparation and application techniques are key to achieving a beautiful, long-lasting finish that safeguards your investment. This section will guide you through the process.
Surface Preparation Before Painting or Staining
Thorough surface preparation is paramount for successful painting or staining. This involves cleaning the siding to remove dirt, mildew, and any loose debris. A pressure washer is effective for this, but be cautious not to damage the wood. After washing, allow the siding to dry completely. Any remaining mildew should be treated with a mildewcide. For bare wood or previously stained areas requiring a complete refinishing, sanding may be necessary to create a smooth surface for better paint or stain adhesion. Repair any remaining imperfections before proceeding. Priming bare wood is highly recommended to improve paint or stain adhesion and prevent premature failure.
Applying Paint or Stain to Repaired Cedar Siding
Applying paint or stain involves several steps. Begin by applying a primer to bare wood or areas where the old finish has been removed. Let the primer dry completely before applying the paint or stain. For even coverage, use long, smooth strokes, working with the grain of the wood. Apply multiple thin coats rather than one thick coat to avoid runs and drips. Allow each coat to dry completely before applying the next. For a more professional look, use a high-quality brush or sprayer, paying close attention to the edges and corners.
Types of Paint and Stain for Cedar Siding
Several paint and stain options are suitable for cedar siding. Oil-based paints offer excellent durability and water resistance, but they have a strong odor and require longer drying times. Water-based paints are lower in VOCs (Volatile Organic Compounds), dry faster, and are easier to clean up, but may not be as durable as oil-based paints. Solid color stains provide complete color coverage while allowing some wood grain to show through. Semi-transparent stains offer a balance between color and wood grain visibility. Transparent stains highlight the natural beauty of the cedar while providing protection from the elements. The best choice depends on your desired look and level of protection.
Techniques for Achieving a Professional Finish
Achieving a professional finish involves careful attention to detail. Use a high-quality brush or sprayer for even application. Maintain a wet edge to prevent lap marks. For a smooth finish, use a back-and-forth technique, ensuring each stroke overlaps slightly. Avoid applying too much paint or stain at once, as this can lead to runs and drips. Work in small sections to maintain a wet edge and ensure consistent coverage. Clean your tools immediately after use to prevent paint or stain from drying and becoming difficult to remove. Consider using painter’s tape to protect areas you don’t want to be painted or stained.
Necessary Tools and Materials
The following table lists the necessary tools and materials for painting or staining cedar siding.
| Tools | Materials | Tools | Materials |
|---|---|---|---|
| Paintbrush (various sizes) | Paint or stain (appropriate type and color) | Putty knife | Wood filler (if needed) |
| Roller (for large areas) | Primer (for bare wood) | Sandpaper (various grits) | Mildewcide (if needed) |
| Paint sprayer (optional) | Painter’s tape | Drop cloths | Cleaning supplies (rags, solvents) |
| Safety glasses | Gloves | Ladder (if needed) | Caulk (if needed) |
Preventive Maintenance for Cedar Siding: Repairing Cedar Siding

Source: sidingauthority.com
Protecting your cedar siding investment involves more than just occasional repairs; it requires a proactive approach to maintenance. Regular care significantly extends the lifespan of your siding, preventing costly repairs and maintaining your home’s curb appeal. By understanding the factors that contribute to cedar siding damage and implementing a preventative maintenance plan, you can enjoy the natural beauty and durability of your siding for years to come.
Regular cleaning and inspection are fundamental to preventing problems before they become major issues. A proactive approach can save you significant time, money, and stress in the long run. Early detection of minor issues allows for simple, cost-effective solutions, preventing them from escalating into extensive and expensive repairs.
Routine Maintenance Schedule for Cedar Siding
A yearly inspection and cleaning, combined with seasonal checks, is recommended for optimal cedar siding maintenance. This schedule allows for early detection of problems like insect infestations, rot, or warping. Spring and fall are ideal times for more thorough inspections, focusing on areas most susceptible to damage.
- Annual Inspection (Spring/Fall): A thorough visual inspection of the entire siding surface, paying close attention to corners, seams, and areas near the ground. Look for signs of rot, warping, cracks, insect damage, or loose boards.
- Spring Cleaning: Remove dirt, debris, and cobwebs using a soft-bristled brush and a garden hose. Focus on removing any buildup that could trap moisture.
- Fall Inspection: Re-inspect the siding for any damage caused by summer weather, such as sun bleaching or insect activity. Check for loose boards or areas where moisture might have accumulated.
- Seasonal Checks: Conduct brief visual checks after severe weather events (storms, heavy rain, snow) to quickly identify any potential damage.
Benefits of Regular Cleaning and Inspection
Regular cleaning removes dirt, pollen, and other debris that can trap moisture and promote the growth of mold and mildew. This helps prevent rot and extends the life of the siding. Regular inspections allow for early detection of minor problems, preventing them from becoming major, costly repairs. Early detection of insect infestations, for example, allows for prompt treatment before significant damage occurs. A well-maintained cedar siding will enhance your home’s curb appeal and property value.
Importance of Proper Ventilation to Prevent Moisture Buildup
Moisture is the biggest enemy of cedar siding. Proper ventilation is crucial to preventing moisture buildup, which can lead to rot, mildew, and insect infestation. Ensure adequate airflow around your home by keeping gutters and downspouts clean and free of obstructions. Consider installing vents in the soffits and eaves to improve air circulation. Avoid planting vegetation too close to the house, as this can block airflow and trap moisture. Properly sealed windows and doors also prevent moisture from entering the house and accumulating in the walls.
Proper Cleaning Techniques for Cedar Siding
Imagine a visual guide showing the steps involved in cleaning cedar siding.
Step 1: Preparation The guide shows a person inspecting the siding for loose debris, checking for damaged areas. They are wearing protective gloves and eye protection. The necessary cleaning tools are laid out: a soft-bristled brush, a garden hose with a nozzle, and a bucket of mild detergent solution (if needed).
Step 2: Pre-Rinse The guide depicts the person using the garden hose with a low-pressure nozzle to rinse the entire siding surface, removing loose dirt and debris. The focus is on even, gentle rinsing to avoid damaging the wood.
Step 3: Cleaning (if needed) If the siding is heavily soiled, the guide shows the person applying a mild detergent solution using a soft-bristled brush. They scrub gently in the direction of the wood grain, avoiding harsh scrubbing that could damage the surface.
Step 4: Rinsing The guide shows a thorough rinsing with the garden hose, again using a low-pressure nozzle, to remove all traces of detergent. They ensure all areas are rinsed thoroughly.
Step 5: Drying The guide depicts the siding naturally drying in the sun and air. It emphasizes the importance of letting the siding air dry completely to prevent moisture buildup.
Summary
Source: co.uk
Restoring your cedar siding doesn’t have to be daunting. By understanding the common causes of damage, employing the appropriate repair methods, and implementing a preventative maintenance plan, you can protect your investment and enhance your home’s curb appeal. Remember, regular inspection and prompt action are key to preventing minor issues from escalating into major repairs. With a little know-how and some elbow grease, you can enjoy the enduring beauty of your cedar siding for years to come.
Frequently Asked Questions
Can I repair cedar siding myself, or should I hire a professional?
Many repairs are DIY-friendly, especially minor cracks or rot. However, extensive damage or complex repairs might require a professional for optimal results.
What’s the best time of year to repair cedar siding?
Spring or fall, when temperatures are moderate and rain is less frequent, are generally ideal for exterior repairs.
How long does cedar siding repair typically take?
This varies greatly depending on the extent of the damage. Minor repairs might take a few hours, while major repairs could take days or even weeks.
What type of wood filler is best for cedar siding?
Choose a high-quality exterior-grade wood filler that matches the color and texture of your cedar siding as closely as possible.
How often should I inspect my cedar siding for damage?
At least twice a year, ideally in spring and fall, is recommended to catch problems early.
Comments are closed.