Hardie Plank Replacement A Complete Guide
Hardie plank replacement isn’t just about fixing damaged siding; it’s about revitalizing your home’s curb appeal and protecting it from the elements. This guide walks you through every step, from identifying the need for replacement to choosing the right materials and completing the installation. We’ll cover everything from assessing damage and budgeting costs to understanding warranties and maintenance. Get ready to transform your home’s exterior!
Whether you’re dealing with faded color, cracked planks, or extensive water damage, understanding the process of Hardie plank replacement is key to a successful project. This guide breaks down the process into manageable steps, helping you determine the extent of the repairs needed, choose the best materials, and manage your budget effectively. We’ll even explore DIY options versus hiring a professional, ensuring you make informed decisions every step of the way.
Understanding Hardie Plank Deterioration
Source: amazonaws.com
Hardie Plank siding, while durable, isn’t indestructible. Understanding the factors that contribute to its deterioration is crucial for predicting its lifespan and planning for eventual replacement. This section will Artikel common causes of failure, visual indicators of damage, and the impact of various factors on the longevity of your Hardie Plank.
Common Causes of Hardie Plank Failure
Several factors contribute to the degradation of Hardie Plank siding. These include improper installation, exposure to harsh weather conditions, and the natural aging process of the material itself. Poorly installed siding is more susceptible to moisture intrusion, leading to cracking, warping, and rotting. Furthermore, damage from impacts, such as hail or flying debris, can compromise the integrity of the planks, creating entry points for water. Finally, the inherent properties of the fiber cement material itself will naturally degrade over time, though this process is usually slow.
Visual Indicators of Needing Hardie Plank Replacement
Recognizing the signs of deterioration is key to timely intervention and preventing more extensive damage. Look for cracks, chips, or significant discoloration in the siding. Warped or bowed planks are also a clear indication of problems, often stemming from moisture intrusion. Peeling or flaking paint (if applicable) suggests a breakdown of the protective coating and potential underlying damage. Finally, the presence of mold or mildew indicates persistent moisture issues that need addressing.
Impact of Weather Conditions on Hardie Plank Lifespan
Weather plays a significant role in the lifespan of Hardie Plank. Prolonged exposure to intense sunlight, especially in hotter climates, can lead to fading and cracking. Frequent freeze-thaw cycles can cause expansion and contraction, eventually leading to stress fractures. High humidity and heavy rainfall increase the risk of moisture penetration, accelerating deterioration. Coastal areas, with their salt spray, face additional challenges as the salt can corrode the fiber cement material.
Deterioration Rates of Different Hardie Plank Colors and Finishes
While Hardie Plank is designed to withstand various weather conditions, the color and finish can influence its lifespan. Darker colors tend to absorb more heat, leading to faster fading and potential cracking compared to lighter colors. The type of finish also plays a role; some finishes offer better protection against UV damage and moisture penetration than others. For instance, a properly applied and maintained paint finish can extend the lifespan significantly, while an unpainted surface will be more vulnerable to the elements.
Typical Lifespan of Hardie Plank Under Various Conditions
| Material | Condition | Lifespan (years) | Notes |
|---|---|---|---|
| Hardie Plank (Painted) | Ideal Climate, Proper Installation, Regular Maintenance | 30-50 | Minimal sun exposure, low humidity |
| Hardie Plank (Painted) | Moderate Climate, Average Installation, Occasional Maintenance | 20-30 | Some sun exposure, moderate humidity |
| Hardie Plank (Unpainted) | Harsh Climate, Poor Installation, No Maintenance | 10-20 | High sun exposure, high humidity, coastal location |
| Hardie Plank (Painted, Dark Color) | Hot, Sunny Climate | 15-25 | Increased risk of fading and cracking due to heat absorption |
Assessing Replacement Needs

Source: sidingpro.co
So, you’ve learned about Hardie Plank deterioration. Now, let’s figure out if you need a repair, a partial replacement, or a complete overhaul of your siding. A thorough inspection is key to making the right decision and avoiding unnecessary costs.
Inspecting Hardie Plank for Damage
A systematic inspection is crucial to accurately assess the extent of damage. Start by examining the entire house, paying close attention to areas most exposed to the elements—like corners, ground level, and areas around windows and doors. Look for signs of damage such as cracks, holes, water stains, rot, insect infestation, and loose or missing pieces. Use binoculars to inspect hard-to-reach areas. Take detailed notes and photographs of any damage found, noting its location and severity. This detailed documentation will be invaluable when discussing repair or replacement options with contractors.
Partial vs. Full Replacement Scenarios
The decision between partial and full replacement depends heavily on the extent and location of the damage. Minor damage, such as a few cracked or damaged planks in a less visible area, often only requires partial replacement. However, widespread damage, especially if it indicates underlying moisture problems or structural issues, might necessitate a full replacement. For example, if significant damage is concentrated in one area, like after a severe storm, a partial replacement focusing on that section might suffice. Conversely, if many planks show signs of consistent water damage across large sections of the house, a full replacement is often more cost-effective and ensures long-term protection.
Factors Influencing Replacement Cost
Several factors influence the overall cost of Hardie Plank replacement. The most significant is the amount of siding needing replacement – a full replacement will naturally cost more than a small repair. The complexity of the job also matters; intricate detailing or difficult-to-access areas will increase labor costs. Material costs vary based on the specific type of Hardie Plank chosen, its color, and current market prices. Labor rates differ regionally and based on contractor experience and demand. Finally, permits and other associated fees will add to the overall cost. For instance, replacing siding on a two-story house with complex trim will be considerably more expensive than replacing a few damaged planks on a single-story ranch.
Importance of Professional Inspection
Before committing to any Hardie Plank replacement project, a professional inspection is highly recommended. A qualified inspector can accurately assess the extent of the damage, identify underlying issues (like moisture intrusion), and recommend the most appropriate course of action. This professional assessment will prevent costly mistakes and ensure that the replacement is both effective and long-lasting. They can also help you understand potential warranty issues related to the original installation. This upfront investment saves money and frustration in the long run.
Homeowner Checklist for Hardie Plank Replacement
- Inspect all sides of the house, paying close attention to corners, ground level, and areas around windows and doors.
- Check for cracks, holes, water stains, rot, insect infestation, and loose or missing pieces.
- Document all damage with notes and photographs.
- Assess the extent of damage: Is it localized or widespread?
- Consider the age and condition of the underlying sheathing and flashing.
- Obtain at least three quotes from reputable contractors.
- Verify the contractors’ licenses and insurance.
- Carefully review the contract before signing.
- Consider the warranty offered on materials and labor.
Replacement Materials and Methods
Choosing the right materials and employing proper installation techniques are crucial for a long-lasting and aesthetically pleasing Hardie Plank replacement. This section details the various options available and provides a step-by-step guide for a successful replacement project.
Hardie Plank Replacement Materials: A Comparison
Several materials can replace damaged Hardie Plank siding, each with its own advantages and disadvantages. Fiber cement, the material of the original Hardie Plank, remains a popular choice due to its durability and low maintenance. Vinyl siding offers a more budget-friendly alternative, but it’s generally less durable and may not mimic the look of fiber cement as closely. Wood siding, while aesthetically pleasing, requires significantly more maintenance and is susceptible to rot, insect damage, and weathering. The best choice depends on your budget, desired aesthetic, and the climate in your area. Fiber cement offers superior longevity and weather resistance, but comes with a higher initial cost. Vinyl offers affordability and ease of installation, but sacrifices some durability and aesthetic appeal. Wood provides a classic look, but demands ongoing maintenance.
Removing Damaged Hardie Plank Sections
Before installing new siding, carefully remove the damaged sections. Start by identifying the extent of the damage. Often, individual planks can be replaced rather than an entire section of siding. Use a pry bar to carefully separate the damaged plank from the surrounding ones. Work slowly and deliberately to avoid damaging adjacent planks or the underlying sheathing. Always wear safety glasses and gloves during this process. Once the damaged plank is removed, inspect the underlying sheathing for any damage and repair as needed. If the damage extends beyond a single plank, you may need to remove a larger section. Remember to take photos before you start removing any siding to help with reinstallation.
Preparing the Surface for New Hardie Plank Installation
Proper surface preparation is vital for a successful installation. Begin by cleaning the area, removing any loose debris, dirt, or old caulk. Ensure the underlying sheathing is sound and free from rot or damage. Repair any damaged sheathing before proceeding. If necessary, apply a waterproof membrane to protect the sheathing from moisture. This step is particularly important in areas prone to moisture buildup. For example, if you notice water damage behind the removed Hardie Plank, you may need to replace a portion of the underlying sheathing and treat it with a wood preservative before applying the membrane. Finally, ensure the surface is clean and dry before beginning the installation of the new siding.
Installing New Hardie Plank Siding
Installing Hardie Plank siding involves several steps. Begin by installing starter strips along the bottom edge of the wall. These provide a level base for the first row of siding. Then, install the first row of siding, ensuring proper alignment and spacing. Use nails or screws specifically designed for fiber cement siding, and avoid overdriving the fasteners. Continue installing subsequent rows, overlapping each plank according to the manufacturer’s instructions. Maintain consistent spacing and alignment throughout the process. Caulk all seams and joints to prevent moisture penetration. Proper flashing around windows and doors is also essential to prevent water damage.
Necessary Tools and Materials for Hardie Plank Replacement
A successful Hardie Plank replacement requires the right tools and materials.
- Safety glasses and gloves
- Pry bar
- Hammer
- Measuring tape
- Level
- Circular saw or hand saw (for cutting fiber cement planks)
- Caulk gun
- Nails or screws appropriate for fiber cement siding
- Starter strips
- New Hardie Plank siding
- Wood preservative (if needed)
- Waterproof membrane (if needed)
- Utility knife
Remember to always consult the manufacturer’s instructions for specific details and recommendations.
Cost and Budgeting for Replacement
Replacing Hardie Plank siding is a significant investment, but understanding the cost breakdown can help you plan effectively. This section will detail the various expenses involved, offer budgeting strategies, and compare DIY versus professional installation.
Cost Breakdown of Hardie Plank Replacement
The total cost of Hardie Plank replacement depends heavily on several factors, including the size of your home, the complexity of the job (e.g., intricate trim work, multiple stories), the cost of materials in your region, and whether you hire a contractor or tackle it yourself. A typical breakdown includes materials (siding, fasteners, flashing, etc.), labor (if hiring a contractor), permits, and waste disposal. Materials typically account for 40-60% of the total cost, while labor often constitutes the remaining 40-60%. Permits and waste disposal are smaller, but essential, components.
Budgeting Strategies for Homeowners
Creating a realistic budget is crucial. Start by getting multiple quotes from reputable contractors. Compare their bids, paying close attention to the detailed breakdown of costs. Consider prioritizing the most critical areas first if budget constraints exist; perhaps focus on the most visible sections of the house initially. Explore financing options like home equity loans or lines of credit if needed. Building a contingency fund (10-20% of the total estimated cost) is wise to handle unexpected expenses. Remember to factor in the potential increase in your home’s value following the upgrade.
DIY versus Professional Installation Cost Comparison
While DIY can significantly reduce labor costs, it demands time, skills, and the purchase of specialized tools. Professional installation ensures quality workmanship, a warranty, and often faster completion. For a large or complex project, the time saved by hiring a professional might outweigh the added cost. A small, straightforward project might be suitable for a DIY approach, provided you have the necessary skills and tools. Consider the potential cost of mistakes or rework if attempting a DIY project. Weigh the value of your time against the cost of professional labor.
Factors Affecting Replacement Cost
Several factors can influence the final cost. The size of your home directly impacts material and labor requirements. Complex designs with intricate trim work or multiple stories increase both material and labor costs. The condition of the existing siding (e.g., extensive damage requiring more extensive repairs) adds to the expense. The cost of materials fluctuates with market conditions, and location plays a role; materials are more expensive in some areas than others. Permitting fees vary by location and project scope.
Sample Budget Spreadsheet
| Budget Item | Estimated Cost | Notes |
|---|---|---|
| Materials (Hardie Plank, fasteners, etc.) | $5,000 – $10,000 | Varies based on house size and material choices |
| Labor (if hiring a contractor) | $4,000 – $8,000 | Depends on contractor rates and project complexity |
| Permits | $200 – $500 | Check local building codes for requirements |
| Waste Disposal | $100 – $300 | Cost depends on the amount of waste generated |
| Contingency (10-20%) | $900 – $3,600 | For unexpected expenses or material price increases |
| Total Estimated Cost | $10,100 – $22,400 | This is a broad estimate and can vary significantly |
Warranty and Maintenance Considerations

Source: belkcustombuilders.com
Understanding the warranty and implementing a proper maintenance plan are crucial for maximizing the lifespan and value of your Hardie Plank siding. Ignoring these aspects can lead to premature deterioration and costly repairs, negating the initial investment in this high-quality product. This section details the importance of warranties and provides a practical maintenance schedule to keep your siding looking its best for years to come.
Hardie Plank Warranty Information
James Hardie, the manufacturer of Hardie Plank siding, offers various warranties depending on the specific product and region. These warranties typically cover manufacturing defects and, in some cases, may extend to issues related to the performance of the material under certain conditions. It’s absolutely vital to register your Hardie Plank siding with the manufacturer after installation to activate the warranty. Failure to register can significantly impact your ability to make a claim if problems arise. Carefully review the warranty documentation provided by your installer or obtained directly from James Hardie to fully understand the terms, conditions, and limitations of the coverage. This includes understanding the duration of the warranty, what is covered, and what is explicitly excluded. Keep this documentation in a safe and accessible place for future reference.
Recommended Maintenance Practices
Regular maintenance is key to preserving the beauty and longevity of your Hardie Plank siding. Neglecting maintenance can lead to the accumulation of dirt, grime, and mildew, which can degrade the siding’s appearance and potentially compromise its structural integrity. A proactive approach minimizes the need for costly repairs or premature replacements.
- Annual Cleaning: Wash your Hardie Plank siding annually with a solution of mild detergent and water. Use a soft-bristled brush or a pressure washer (on a low setting) to remove dirt and debris. Always rinse thoroughly to prevent detergent residue from building up. Pay close attention to areas prone to mildew growth, such as shaded areas or areas near vegetation.
- Regular Inspection: Inspect your siding at least twice a year, particularly after severe weather events. Look for any signs of damage, such as cracks, loose panels, or signs of water damage. Addressing minor issues promptly can prevent them from escalating into larger, more costly problems.
- Caulk Repair: Regularly inspect and re-caulk around windows, doors, and other areas where the siding meets other building components. Caulk helps to seal out moisture and prevent water damage.
- Mildew Removal: If mildew appears, clean it promptly using a mildew-removing solution following the manufacturer’s instructions. For stubborn mildew, consider using a pressure washer on a low setting, but be careful not to damage the siding.
- Trim and Vegetation Management: Keep trees and shrubs trimmed back from your siding to prevent branches from scratching or damaging the surface. Overgrown vegetation can also trap moisture against the siding, promoting mildew growth.
Impact of Proper Maintenance on Avoiding Premature Replacement
Proactive maintenance significantly reduces the likelihood of premature Hardie Plank replacement. By addressing minor issues before they become major problems, you’ll avoid costly repairs and extend the lifespan of your siding. For instance, promptly cleaning mildew prevents it from penetrating the siding’s surface and causing discoloration or structural damage. Similarly, regular inspections and caulking repairs prevent water infiltration, which is a major cause of siding deterioration. Investing time in routine maintenance translates to substantial long-term savings and peace of mind.
Preventing Future Damage
Preventing damage to your Hardie Plank siding involves a combination of proactive measures and mindful practices. Avoiding impact damage from dropped objects or tools is crucial. Using appropriate tools and techniques during any exterior work will minimize the risk of accidental scratches or dents. Properly securing ladders and preventing them from scraping against the siding is another important step. In addition, protecting the siding from harsh weather conditions, such as prolonged exposure to direct sunlight or extreme temperature fluctuations, is also essential.
Maintenance Schedule
Regular maintenance is essential for the long-term health of your Hardie Plank siding. Here’s a recommended maintenance schedule:
- Annual: Thorough cleaning with mild detergent and water; complete inspection for damage; caulking repair; mildew removal as needed.
- Semi-Annual (Spring & Fall): Quick inspection for damage; trim back overhanging branches and vegetation.
- As Needed: Repair any identified damage promptly; address any mildew issues immediately.
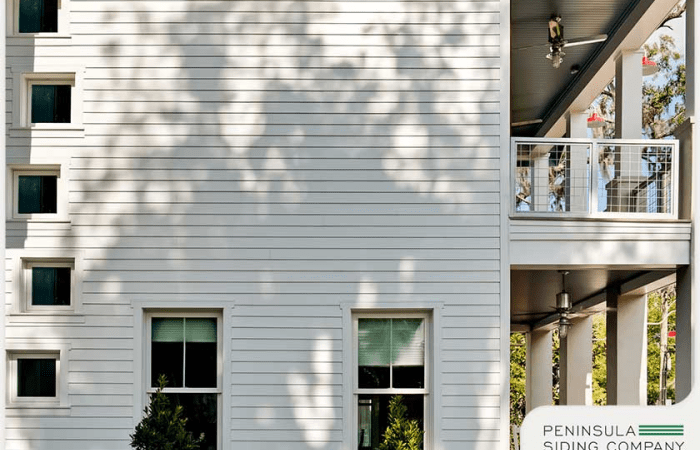
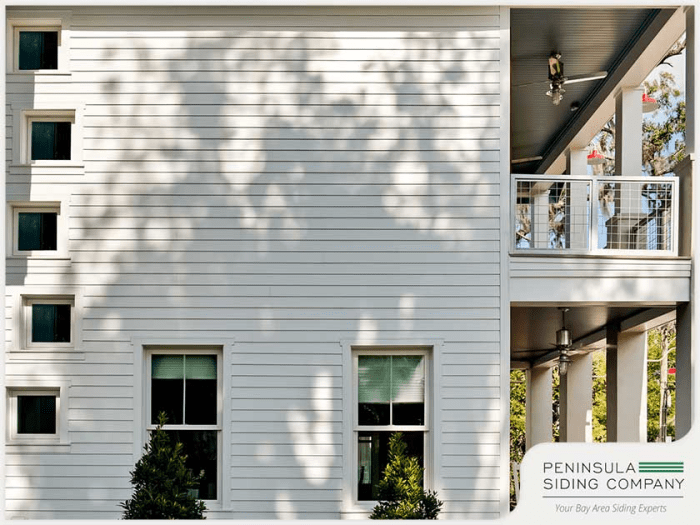
Visual Examples of Successful Replacements
Replacing Hardie Plank siding offers a fantastic opportunity to refresh your home’s exterior. The right color and style choices can dramatically enhance curb appeal and property value. Let’s explore some successful projects and the design considerations involved.
Successful Hardie Plank replacement projects hinge on careful planning and execution. The final look is a direct reflection of the materials chosen and the skill of the installation team. Paying close attention to detail throughout the process is key to achieving a stunning and long-lasting result.
Color and Style Choices for Hardie Plank
Choosing the right colors and styles for your Hardie Plank replacement is crucial for achieving a cohesive and aesthetically pleasing outcome. Consider the architectural style of your home, the surrounding landscape, and your personal preferences when making your selections. A classic, neutral color palette can create a timeless look, while bolder colors can add a modern and vibrant touch. The texture of the Hardie Plank itself—whether smooth, wood-grained, or stucco-embossed—also plays a significant role in the overall aesthetic.
Examples of Successful Hardie Plank Replacement Projects
One project involved a craftsman-style home where the original cedar siding had deteriorated. Replacing it with a deep, rich brown Hardie Plank with a subtle wood grain texture perfectly complemented the home’s architectural details. The color choice added warmth and sophistication, while the texture provided a natural, organic feel.
Another successful project transformed a ranch-style home with outdated vinyl siding. The homeowners opted for a crisp, clean white Hardie Plank with a smooth finish. This choice created a bright, modern look that opened up the home visually and increased its curb appeal. The clean lines of the siding complemented the simple architecture of the house.
A third example showcased a Victorian home with intricate detailing. The homeowner chose a muted grey Hardie Plank with a subtle texture to complement the home’s ornate features without overpowering them. The color provided a sophisticated neutral backdrop, allowing the architectural details to take center stage.
Impact of Proper Installation on Aesthetics
Proper installation is paramount for a visually appealing and long-lasting Hardie Plank siding job. Consistent spacing between planks, straight lines, and neatly finished corners are essential for a professional look. Inconsistent installation can lead to uneven surfaces, gaps, and other imperfections that detract from the overall aesthetic. Careful attention to detail during installation ensures a clean, finished look that enhances the home’s curb appeal.
Different Hardie Plank Colors and Textures
The selection of Hardie Plank colors and textures is extensive, allowing for diverse design possibilities. Consider these examples:
- Colors: Classic white, warm greys, deep browns, earthy greens, sophisticated blues, and even bold reds and yellows are all viable options, depending on the desired aesthetic.
- Textures: Smooth finishes provide a clean, modern look. Wood-grained textures offer a more natural, rustic feel. Stucco-embossed textures add a touch of traditional elegance.
Closure
Replacing your Hardie plank siding is a significant investment, but with careful planning and execution, it can dramatically improve your home’s appearance and longevity. Remember to thoroughly assess the damage, choose high-quality materials, and consider your budget and timeline. Whether you tackle the project yourself or hire a contractor, this guide provides the knowledge and resources to ensure a successful and aesthetically pleasing outcome. Your renewed home exterior awaits!
Q&A: Hardie Plank Replacement
Can I replace just a few damaged planks, or do I need to replace the entire siding?
You can often replace just damaged sections, but extensive damage or inconsistent aging might necessitate full replacement for a uniform look and to avoid future issues.
How long does a Hardie Plank replacement project typically take?
The timeframe varies greatly depending on the size of the project, the extent of the damage, and whether you’re DIYing or hiring a contractor. Expect several days to several weeks.
What’s the best way to dispose of old Hardie Plank?
Check with your local waste management facility for proper disposal methods. They may have specific guidelines for handling fiber cement materials.
Are there any permits required for Hardie Plank replacement?
Permit requirements vary by location. Check with your local building department before starting the project to avoid potential fines.
What kind of warranty should I expect on new Hardie Plank?
James Hardie offers warranties on their products; however, the specifics depend on the product and installation. Review the warranty details carefully.
Comments are closed.