Replace Vinyl Siding With Hardie Board
Replace vinyl siding with Hardie board? It’s a bigger project than you might think, but the payoff—a more durable, attractive, and potentially more valuable home—is worth considering. This guide walks you through the process, from initial cost comparisons to choosing the right installer, ensuring you’re well-informed every step of the way. We’ll cover everything from material properties and installation techniques to long-term maintenance and environmental impacts, helping you make an educated decision about upgrading your home’s exterior.
This guide provides a comprehensive overview of replacing vinyl siding with Hardie board, covering cost analysis, installation procedures, material comparisons, aesthetic choices, environmental considerations, maintenance strategies, permitting requirements, and contractor selection. We aim to equip you with the necessary knowledge to successfully undertake this home improvement project.
Cost Comparison
Replacing your vinyl siding with Hardie board is a significant home improvement project, and understanding the costs involved is crucial for budgeting and planning. This section breaks down the price differences between these two popular siding options, considering both upfront expenses and long-term costs.
Average Costs of Vinyl Siding vs. Hardie Board Replacement
The cost of replacing siding varies widely based on several factors. However, we can provide a general comparison to illustrate the typical price differences. Remember, these are averages and your actual costs may differ.
| Item | Vinyl Siding Cost | Hardie Board Cost | Cost Difference |
|---|---|---|---|
| Materials (per 100 sq ft) | $100 – $300 | $300 – $600 | $200 – $300 |
| Labor (per 100 sq ft) | $100 – $200 | $150 – $300 | $50 – $100 |
| Removal of Old Siding (per 100 sq ft) | $50 – $100 | $50 – $100 | $0 – $0 |
| Total (per 100 sq ft) | $250 – $600 | $500 – $1000 | $250 – $400 |
Note that these figures are estimates and can fluctuate based on several factors. For example, a larger house will naturally require more materials and labor, driving up the total cost. Intricate architectural details, such as numerous dormers or complex trim work, also add to the labor involved, increasing the overall expense. Regional differences in labor rates and material costs also play a significant role. For instance, labor costs in major metropolitan areas tend to be higher than in rural regions. Material costs can also vary depending on supply and demand, as well as transportation costs to your specific location.
Long-Term Cost-Effectiveness
While the Hardie board has a higher initial cost, its longevity and low maintenance requirements make it a more cost-effective choice in the long run.
| Factor | Vinyl Siding | Hardie Board |
|---|---|---|
| Initial Cost | Lower | Higher |
| Lifespan | 15-20 years | 30-50 years |
| Maintenance | Moderate (periodic cleaning, potential repairs) | Low (occasional cleaning, minimal repairs) |
| Replacement Cost | Requires replacement sooner | Requires replacement later |
Consider a hypothetical scenario: A homeowner replaces vinyl siding every 20 years at an average cost of $5000. Over 50 years, this amounts to $12,500. If they opted for Hardie board initially, costing $10,000, they would only need one replacement over the same period, resulting in a lower overall cost. This example highlights the importance of considering the entire lifecycle cost rather than focusing solely on the initial investment.
Installation Process
Replacing vinyl siding with Hardie board is a significant home improvement project that requires careful planning and execution. This step-by-step guide will walk you through the process, ensuring a professional-looking and long-lasting result. Remember, safety is paramount; always prioritize your well-being throughout the project.
The entire process can be broken down into three main phases: removing the old siding, preparing the wall, installing the Hardie board, and finishing touches. Each phase requires specific tools and techniques.
Removing Existing Vinyl Siding
Before you can install the Hardie board, you need to remove the old vinyl siding. This involves carefully detaching each piece, starting from the bottom and working your way up. Take your time to avoid damaging the underlying sheathing.
- Start at the bottom corner, carefully prying off the bottom row of siding with a pry bar. Work slowly and gently to avoid damaging the siding or the underlying wall.
- Once the bottom row is removed, continue working your way up, removing each row of siding one at a time. Be mindful of nails and staples, and use appropriate safety gear.
- As you remove the siding, carefully inspect the underlying wall for any damage or rot. Repair any issues before proceeding to the next step.
- Dispose of the old vinyl siding responsibly according to local regulations. Some recycling centers accept vinyl siding.
Preparing the Wall Surface
Once the vinyl siding is removed, it’s crucial to thoroughly prepare the wall surface for the new Hardie board. This ensures proper adhesion and prevents future problems.
- Inspect the wall sheathing for any damage, rot, or insect infestation. Replace any damaged sections with new sheathing material.
- Clean the wall surface thoroughly to remove any dirt, debris, loose paint, or other contaminants that could interfere with adhesion. A pressure washer can be helpful, but use caution to avoid damaging the underlying sheathing.
- Repair any imperfections in the wall surface, such as holes or gaps, using appropriate patching materials. Ensure the surface is smooth and even before installing the Hardie board.
- If necessary, apply a primer to the wall surface to improve adhesion and provide a consistent base for the Hardie board. Allow the primer to dry completely before proceeding.
Installing Hardie Board
With the wall prepared, you can begin installing the Hardie board. This involves carefully measuring, cutting, and fastening the panels to the wall.
- Start at a corner and work your way across the wall. Use a level to ensure the first panel is perfectly aligned.
- Use appropriate fasteners, such as galvanized nails or screws, to secure the Hardie board to the wall sheathing. Follow the manufacturer’s recommendations for fastener spacing and placement.
- Cut the Hardie board to fit around windows, doors, and other obstacles using a circular saw with a fine-tooth blade. Always wear appropriate safety gear, including eye protection and a dust mask.
- Overlap the panels according to the manufacturer’s instructions, typically with a 1/4-inch overlap. Ensure a tight fit to prevent water penetration.
- Maintain consistent spacing between panels and use appropriate shims to ensure a straight and even installation.
Finishing the Installation
The final stage involves adding the finishing touches to complete the project, ensuring a professional and weather-resistant exterior.
- Caulk all seams and joints between the Hardie board panels to prevent water penetration. Use a high-quality exterior-grade caulk.
- Install flashing around windows and doors to direct water away from these vulnerable areas. Proper flashing is crucial for preventing water damage.
- Install trim boards around windows, doors, and corners to complete the aesthetic look and provide additional protection against the elements. Choose a trim that complements the Hardie board.
- Finally, inspect the entire installation for any imperfections or areas needing attention. Make any necessary repairs before the project is considered complete.
Material Properties and Durability
Choosing between vinyl siding and Hardie board involves understanding their inherent differences in material properties, directly impacting their longevity and maintenance needs. Vinyl, a plastic-based material, and Hardie board, a fiber cement composite, offer distinct advantages and disadvantages when it comes to weathering the elements and resisting damage.
Let’s delve into a detailed comparison of their properties, considering durability, damage resistance, and maintenance.
Vinyl Siding and Hardie Board Property Comparison
This table summarizes the key differences between vinyl siding and Hardie board, highlighting where each material excels.
| Property | Vinyl Siding | Hardie Board | Comparative Advantage |
|---|---|---|---|
| Durability | Moderate; susceptible to cracking, warping, and fading under extreme temperature fluctuations. | High; resists cracking, warping, and fading, offering superior structural integrity. | Hardie board offers significantly greater durability and longevity. |
| Impact Resistance | Low; easily dented or damaged by impacts, such as hail or flying debris. | High; resists impacts better than vinyl, showing less damage from hail or accidental impacts. A strong blow can still cause damage, but it’s more resistant. | Hardie board provides superior impact resistance. |
| Weather Resistance | Moderate; can withstand moderate weather conditions, but extreme heat, cold, or moisture can cause damage. | High; designed to withstand extreme weather conditions, including heavy rain, snow, and strong winds. It is also less susceptible to moisture damage. | Hardie board offers superior weather resistance, particularly in harsh climates. |
| Pest Resistance | Generally good; not attractive to most pests, though some rodents may still gnaw on it. | Excellent; resistant to termites and other wood-boring insects. | Hardie board provides superior pest resistance, especially concerning termites. |
| Maintenance Requirements | Low; typically requires occasional cleaning. Repairing damage can be more challenging and may involve replacing sections. | Low to moderate; requires occasional cleaning and repainting every 10-15 years (depending on climate and paint quality). Repairing the damage is generally easier, often involving patching rather than whole-section replacement. | While both require minimal maintenance, the Hardie board’s repairability offers a slight advantage. |
| Lifespan | 20-30 years (depending on climate and installation quality); may require replacement sooner in harsh climates. | 50+ years (depending on climate and maintenance); can last significantly longer with proper care and repainting. | Hardie board offers a significantly longer lifespan. A house sided with Hardie board in a mild climate could easily last 70+ years. |
Lifespan Under Various Climatic Conditions
The lifespan of both vinyl siding and Hardie board is significantly influenced by climate. In milder climates with moderate temperature fluctuations and minimal extreme weather events, both materials can last longer than in harsher environments. However, the Hardie board consistently demonstrates a longer lifespan, even under extreme conditions. For instance, a house in Florida with vinyl siding might require replacement after 20 years due to sun damage and humidity, while a similar house with Hardie board could easily last 40 years or more with proper maintenance. Conversely, in a northern climate with frequent freeze-thaw cycles, vinyl siding might crack and warp more readily, shortening its lifespan compared to Hardie board’s superior resistance to these conditions.
Aesthetic Considerations and Design Options
Source: thespruce.com
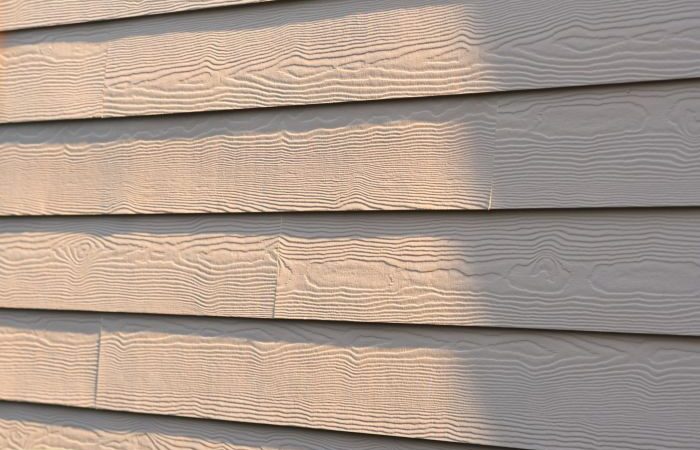
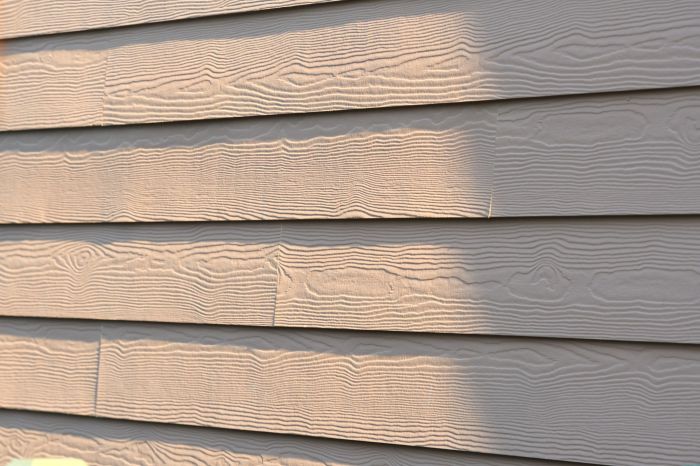
Hardie board siding offers a wide array of aesthetic possibilities, allowing homeowners to enhance their home’s curb appeal and reflect their style. The versatility of the material extends beyond its durability and longevity, providing a canvas for creative exterior design. Understanding the available styles, colors, and design techniques is crucial for achieving the desired look.
Hardie board’s appeal lies in its ability to mimic the appearance of traditional materials like wood clapboard or shingles while offering superior performance. This allows for a blend of classic aesthetics with modern practicality. Its versatility in design applications opens up numerous options for homeowners looking to improve their home’s exterior.
Hardie Board Siding Styles and Colors
Hardie board siding comes in a variety of styles to suit different architectural preferences. The most common styles include lap siding (resembling traditional wood clapboard), shingle siding (imitating wood or cedar shingles), and vertical siding (offering a more modern, sleek look). Beyond these basic styles, Hardie offers textured options that replicate the look of natural wood grains. Color choices are extensive, ranging from classic neutrals like white, gray, and beige to bolder hues and earth tones. Custom color matching is also often available. The color palette is designed to withstand the elements and maintain its vibrancy over time.
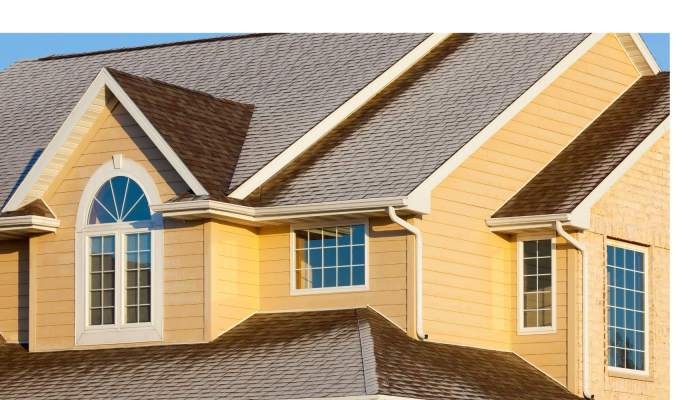
Hardie Board and Architectural Styles
Hardie board’s adaptability makes it a suitable choice for a variety of architectural styles. For example, lap siding in a classic white or cream color can complement a traditional colonial home, while a darker, more textured shingle siding can enhance the rustic charm of a craftsman-style house. Modern homes can benefit from the clean lines of vertical siding in a contemporary color. The ability to customize color and texture allows for seamless integration of the Hardie board into almost any existing architectural design.
Hardie Board Siding Design Examples
Choosing the right Hardie board design involves careful consideration of the house’s architecture, the surrounding landscape, and personal preferences. Here are a few examples showcasing the versatility of Hardie board:
Below are some design examples illustrating the potential of Hardie board in different applications. These examples highlight the material’s ability to adapt to various architectural styles and homeowner preferences.
- Example 1: A Traditional Colonial Home. Lap siding in a classic white with black shutters and trim creates a timeless and elegant look. This design emphasizes clean lines and symmetry, typical of colonial architecture. The subtle texture of the Hardie board adds depth without overpowering the overall aesthetic.
- Example 2: A Modern Farmhouse. Vertical siding in a warm gray, accented with darker gray trim and white window frames, creates a contemporary yet inviting feel. This design balances modern simplicity with the rustic charm associated with farmhouse style. The clean lines of the vertical siding contrast nicely with the more organic shapes of the house’s architectural details.
- Example 3: A Rustic Cabin. Shingle siding in a weathered gray or brown, mimicking the appearance of cedar shakes, enhances the rustic character of a cabin or mountain home. This design uses the texture of the Hardie board shingles to create a visually appealing, natural look. The color choice contributes to the overall rustic aesthetic.
Environmental Impact and Sustainability
Choosing between vinyl siding and Hardie board involves considering more than just aesthetics and cost; the environmental impact of each material is a crucial factor in making a sustainable choice for your home. Both materials have environmental footprints, but their impacts differ significantly throughout their lifecycles, from manufacturing to disposal.
The manufacturing process and disposal of these materials present distinct environmental challenges. Vinyl siding production is energy-intensive, relying heavily on fossil fuels and emitting greenhouse gases. It’s also not easily recyclable, often ending up in landfills where it persists for centuries. Hardie board, while requiring energy for its manufacture, utilizes more readily available and sustainable materials like cement and wood fiber. Its disposal also presents fewer long-term environmental concerns compared to vinyl.
Manufacturing Processes and Associated Emissions
Vinyl siding production is a significant source of greenhouse gas emissions due to its reliance on petroleum-based polymers. The manufacturing process also generates air and water pollution. In contrast, the Hardie board, composed primarily of cement and wood fiber, has a lower carbon footprint during manufacturing. While cement production does contribute to emissions, the overall impact is generally considered less substantial than that of vinyl siding production. The wood fiber component, often sourced from sustainably managed forests, can further offset the carbon footprint, especially if certified sustainable sources are used. A lifecycle assessment comparing the two would show a considerable difference in greenhouse gas emissions, favoring Hardie board.
Material Recyclability and End-of-Life Management
Vinyl siding’s low recyclability rate contributes significantly to landfill waste. While some recycling programs exist, they are limited, and the process often requires significant energy input. Hardie boards, while not fully recyclable in the traditional sense, can be disposed of in landfills with less environmental consequence. Its composition breaks down over time at a much faster rate than vinyl, minimizing its long-term impact on the environment. Furthermore, some components of Hardie board, such as wood fiber, may decompose naturally over time, unlike the persistent nature of vinyl.
Long-Term Environmental Benefits of Hardie Board
Choosing Hardie board over vinyl siding offers several long-term environmental benefits. Its lower carbon footprint during manufacturing and its comparatively easier end-of-life management contribute to reduced landfill waste and a smaller overall environmental impact. The longer lifespan of the Hardie board also reduces the need for frequent replacements, further minimizing the environmental burden associated with manufacturing and disposal. For example, a homeowner replacing vinyl siding every 15-20 years, compared to the 50+ year lifespan of Hardie board, would significantly increase the overall environmental impact of the vinyl over the long run. This longevity also reduces the overall demand for raw materials and energy needed to produce replacements.
Maintenance and Repair: Replace Vinyl Siding With Hardie Board
Source: elitehomeexteriorsnw.com
Hardie board siding, while incredibly durable, still requires some attention to maintain its beauty and longevity. Regular cleaning and occasional repairs are key to keeping your home looking its best and preventing more extensive, costly problems down the line. Unlike vinyl, which is relatively low-maintenance, Hardie board demands a slightly more hands-on approach, but the payoff in terms of durability and curb appeal is well worth it.
Proper maintenance of your Hardie board siding will significantly extend its lifespan and protect your investment. This involves a combination of routine cleaning and prompt attention to any damage. Neglecting maintenance can lead to problems ranging from unsightly stains to structural damage, impacting both the aesthetics and value of your home.
Cleaning Hardie Board Siding
Regular cleaning is crucial for preventing dirt, mildew, and algae buildup. A simple solution of water and a mild detergent, applied with a soft-bristled brush or pressure washer (using low pressure to avoid damage), is usually sufficient. For stubborn stains, a solution of bleach and water (always following the manufacturer’s instructions) may be necessary. Remember to rinse thoroughly after cleaning. Annual cleaning is recommended, but more frequent cleaning may be needed in areas with heavy pollution or vegetation.
Repairing Damaged Hardie Board, Replace vinyl siding with Hardie board.
Minor damage, such as small dents or scratches, can often be repaired with a putty designed for fiber cement. Larger holes or cracks may require replacing the damaged section. This usually involves carefully removing the damaged piece, measuring the area, cutting a replacement piece to size, and securing it with appropriate fasteners. Always ensure proper sealing around the repaired area to prevent moisture intrusion.
Common Hardie Board Issues, Solutions, and Prevention
Understanding common problems and their solutions can help you proactively maintain your siding and prevent costly repairs.
| Problem | Solution | Prevention |
|---|---|---|
| Cracks or Chips | Repair with fiber cement patching compound or replace the damaged section. | Regular inspection, and careful handling during landscaping or other exterior work. |
| Mildew or Algae Growth | Clean with a solution of bleach and water (following the manufacturer’s instructions). | Regular cleaning, proper ventilation, and ensuring landscaping doesn’t impede airflow. |
| Water Damage | Repair any damaged flashing or caulking. Address underlying moisture problems. May require the replacement of severely damaged sections. | Regular inspection of caulking and flashing, prompt repair of any leaks. Proper installation to ensure water runoff. |
| Nail Pops | Countersink and reseal. | Proper installation techniques, using appropriate fasteners, and ensuring proper spacing. |
| Paint Failure | Repaint or restain, ensuring proper surface preparation. | Using high-quality paint or stain specifically designed for fiber cement siding. Regular inspection for signs of paint deterioration. |
Hardie Board vs. Vinyl Siding Maintenance
Hardie board requires more maintenance than vinyl siding. Vinyl siding is generally very low-maintenance, requiring only occasional cleaning. However, the Hardie board’s superior durability and longevity make the extra effort worthwhile for many homeowners. While vinyl may need replacement more frequently due to fading or damage, Hardie board, with proper maintenance, can last for decades. The choice depends on your priorities and willingness to invest time in upkeep.
Permitting and Regulations
Replacing your vinyl siding with Hardie board, while a significant home improvement, often requires navigating the local permitting process. This ensures your project adheres to building codes and safety regulations, protecting both you and your property. Failing to obtain the necessary permits can lead to fines, delays, and even the need to undo completed work.
Understanding the specific requirements for your area is crucial. These requirements vary considerably depending on location, the scope of your project, and the type of Hardie board you choose. Generally, larger projects or those involving significant structural changes will require more extensive permits.
Permit Application Process
The permit application process typically begins with submitting a detailed application to your local building department. This application will require information about your property, and the planned work, and often includes detailed drawings or plans. You might need to provide your property address, legal description, and contact information. The application will also need to describe the materials to be used (specifying the type of Hardie board) and often include detailed drawings showing the proposed installation, including any changes to flashing, trim, or other building components. Expect to provide details on the contractor’s license and insurance information if you’re using one. The application may also require a fee, which varies based on the project’s size and complexity. After submission, the building department will review your application, and you might be required to attend an inspection before the work begins and after it is completed.
Hardie Board-Specific Regulations
Many building codes have specific requirements for fiber cement siding like Hardie board. These regulations often focus on fire resistance, moisture resistance, and proper installation techniques. For example, codes might specify the minimum thickness of the Hardie board for different applications, or mandate the use of specific fasteners and flashing materials. Local codes might also address issues such as the proper spacing between boards and the use of expansion joints to prevent cracking. Failure to meet these specific regulations can result in permit denial or require costly rework after installation. Checking with your local building department to confirm the precise regulations applicable to your area is crucial.
Necessary Documentation and Approvals
The documentation required will vary, but you can generally expect to need:
- Completed permit application form.
- Property ownership documentation.
- Detailed plans and specifications of the siding replacement, including materials list.
- Contractor’s license and insurance (if applicable).
- Proof of payment of permit fees.
After submitting your application, the building department will review it. This review process can take several days or even weeks, depending on the workload and complexity of the project. Once approved, you’ll receive a permit allowing you to begin the work. You’ll likely need to schedule inspections at various stages of the project, typically before installation begins and after completion. These inspections verify that the work is being performed according to the approved plans and meets local building codes. Failure to pass inspection can lead to delays until necessary corrections are made. A final inspection typically results in a certificate of occupancy or a similar document signifying completion and compliance.
Finding Qualified Installers
Choosing the right installer is crucial for a successful Hardie board siding project. A skilled and experienced contractor ensures a quality installation that maximizes the longevity and aesthetic appeal of your new siding. Ignoring this step can lead to costly repairs, aesthetic issues, and even voiding warranties.
Selecting a qualified contractor involves careful consideration of several key factors. This isn’t just about finding the cheapest option; it’s about finding someone who understands the intricacies of Hardie board installation and possesses the necessary expertise to complete the job correctly.
Contractor Credentials and Licensing
Verifying a contractor’s credentials is paramount. This includes checking for proper licensing and insurance. A valid license demonstrates that the contractor has met the minimum requirements set by your local authorities, indicating a level of competency and adherence to regulations. Comprehensive insurance protects you from potential liabilities in case of accidents or damage during the installation process. You should request proof of both licensing and insurance before agreeing to any work. Don’t hesitate to contact your local licensing board to verify the information provided. Furthermore, researching online reviews and testimonials can provide valuable insights into a contractor’s reputation and past performance.
Experience with Hardie Board
Hardie board installation requires specific skills and knowledge. While some contractors might be experienced with general siding installation, it’s essential to find someone who specifically specializes in Hardie board. This material has unique characteristics that require a nuanced understanding of proper installation techniques to prevent issues like water damage or premature deterioration. Inquire about the contractor’s experience with Hardie board projects, and the number of similar projects they’ve completed, and request references from past clients. Experienced installers are more likely to deliver a high-quality, long-lasting result.
Obtaining Multiple Quotes and Comparing Offers
Getting multiple quotes from different contractors is a crucial step in ensuring you receive a fair price for the job. Comparing quotes allows you to evaluate not only the cost but also the scope of work, materials used, and the contractor’s proposed timeline. Be sure the quotes include detailed breakdowns of labor costs, material costs, and any additional fees. Don’t solely focus on the lowest price; consider the overall value and reputation of the contractor. A slightly higher price might be justified by superior workmanship, a stronger warranty, and a better reputation. Remember, the cheapest option isn’t always the best option.
Last Recap

Source: storables.com
Upgrading your home’s exterior with Hardie board offers significant long-term benefits, despite the initial investment. While the process of replacing vinyl siding with Hardie board involves careful planning and execution, understanding the costs, installation, and maintenance involved empowers you to make a smart and informed decision. Remember to factor in the increased durability, aesthetic appeal, and potential resale value when weighing your options. With proper preparation and the right installer, you can enjoy a beautiful and resilient home exterior for years to come.
FAQ Overview
Can I install the Hardie board myself?
While possible for experienced DIYers, professional installation is generally recommended due to the complexity and safety considerations involved.
How long does Hardie board siding last?
Hardie board siding boasts a lifespan significantly longer than vinyl, often lasting 30-50 years or more with proper maintenance.
Does the Hardie board require painting?
While pre-painted options exist, most Hardie board siding requires painting for protection and aesthetic appeal. Choose a high-quality exterior paint designed for fiber cement.
Is Hardie board susceptible to damage from hail?
Hardie board is more resistant to hail damage than vinyl siding, but severe hail can still cause dents or cracks. Consider your local climate when making your decision.
What about insurance implications?
Replacing vinyl siding with a more durable material like Hardie board might improve your homeowner’s insurance coverage or premiums. Check with your insurer.
Comments are closed.