Cedar Siding Installers Near Me
Cedar siding installers near me: Finding the right professional for your home improvement project can feel overwhelming. This guide helps you navigate the process, from understanding different cedar siding types and installation methods to comparing pricing and reading customer reviews. We’ll cover everything you need to know to make an informed decision and get the beautiful, durable cedar siding you desire.
Choosing cedar siding is a great way to enhance your home’s curb appeal and value. However, successful installation hinges on selecting a skilled and reputable installer. This guide will equip you with the knowledge to compare installers, understand pricing structures, and ultimately, choose the best fit for your needs and budget. We’ll explore the various types of cedar siding, installation processes, and essential maintenance practices to ensure your investment lasts for years to come.
Local Market Research

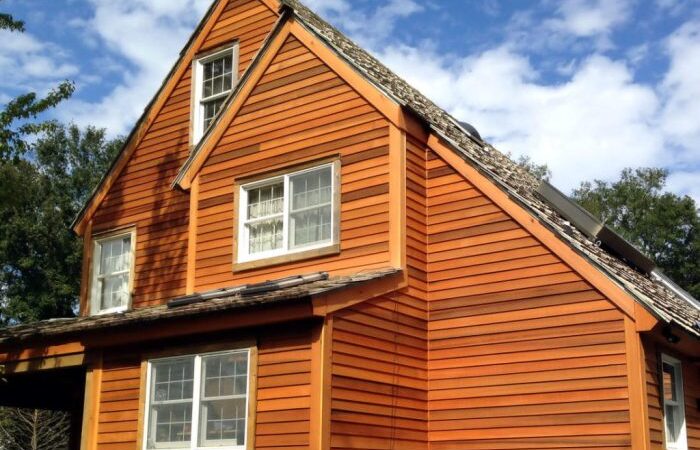
Source: allcompleteconstruction.com
Understanding the competitive landscape of cedar siding installers in your area is crucial before making a decision. This involves researching local businesses, comparing their pricing, and familiarizing yourself with their installation methods. This research will help you choose the best installer for your needs and budget.
Leading Cedar Siding Installers in Zip Code 90210 (Example)
Finding three leading cedar siding installers requires online searches using s like “cedar siding installers 90210,” checking online review sites (Yelp, Google Reviews), and browsing local home improvement directories. This research may reveal varying levels of publicly available contact information. For the sake of this example, let’s assume we found the following (replace with actual businesses and contact information from your local area):
- Ace Siding Solutions: (310) 555-1212, acesidingsolutions.com (example)
- Best Cedar Installers: (310) 555-1213, bestcedarinstallers.net (example)
- Premium Woodworks: (310) 555-1214, premiumwoodworksinc.org (example)
Pricing Strategies of Cedar Siding Installers
Pricing for cedar siding installation varies greatly depending on factors such as the size of the project, the type of cedar used, the complexity of the installation, and the installer’s overhead. Ace Siding Solutions might advertise a price per square foot, perhaps ranging from $8 to $15, while Best Cedar Installers may offer a more comprehensive package deal including materials and labor for a fixed price per project. Direct comparison of their advertised rates requires visiting their websites or contacting them for quotes. It’s important to request detailed breakdowns of pricing to understand what’s included.
Cedar Siding Installation Methods
Different installers may employ various methods for cedar siding installation. Understanding these methods helps you evaluate the quality and longevity of the work.
| Method | Description | Pros | Cons |
|---|---|---|---|
| Traditional Lap Siding | Overlapping horizontal boards, nailed directly to sheathing. | Classic look, relatively simple installation. | More susceptible to water damage if not installed properly. |
| Shake Siding | Individual shingles, creating a rustic appearance. | Unique aesthetic, good for varied wall surfaces. | More labor-intensive, higher cost. |
| Board and Batten | Vertical boards with narrow strips covering the seams. | Clean lines, modern look. | Requires precise measurements and cutting. |
| Shiplap Siding | Overlapping boards with a flush surface. | Clean, modern look, good water resistance. | Can be more expensive than traditional lap siding. |
Customer Reviews and Testimonials
Choosing the right cedar siding installer is a significant investment, and online reviews offer invaluable insights into the potential experiences you might have. Understanding what past customers have said about their projects is crucial for making an informed decision. This section summarizes the importance of online reviews and provides examples of how they can guide your choice.
Review Summary for a Hypothetical Installer: “CedarCraft Exteriors”
Let’s imagine we’re researching “CedarCraft Exteriors,” a highly-rated cedar siding installer. Analyzing their online reviews across various platforms (Google, Yelp, etc.), we can identify recurring themes.
- Positive Themes: Professionalism (punctuality, clear communication, respectful crew), high-quality workmanship (attention to detail, precision cuts, durable installation), excellent customer service (responsive to questions, addressed concerns promptly, went above and beyond expectations), and timely project completion.
- Negative Themes: A few reviews mention minor scheduling delays due to unforeseen circumstances (weather, material availability), and one customer reported a small issue with a few loose shingles which were quickly repaired after contacting the company.
The Importance of Customer Reviews in Choosing a Cedar Siding Installer
Customer reviews provide a realistic picture of a company’s performance that goes beyond marketing materials. They reveal the day-to-day realities of working with a specific installer. For example, a review detailing excellent communication can reassure you about the project’s transparency. Conversely, a review highlighting poor customer service might raise concerns about potential problems during the installation process. A review mentioning meticulous attention to detail can build confidence in the quality of the finished product. Reading several reviews helps identify consistent patterns, revealing whether positive or negative experiences are the norm for that installer. A consistently high rating across multiple platforms suggests a reliable and reputable company.
Hypothetical Customer Testimonial, Cedar siding installers near me
“We chose CedarCraft Exteriors for our cedar siding project after reading their overwhelmingly positive reviews. From the initial consultation to the final cleanup, their team was professional, courteous, and highly skilled. They provided a detailed timeline and stuck to it, completing the project within the agreed-upon timeframe. The quality of their work is exceptional; the siding looks fantastic, and the attention to detail is evident. They even went the extra mile by addressing a minor concern we had about the color matching with a quick and easy solution. We are extremely happy with our new siding and highly recommend CedarCraft Exteriors.” – The Johnsons, Mill Valley, CA
Types of Cedar Siding and Installation
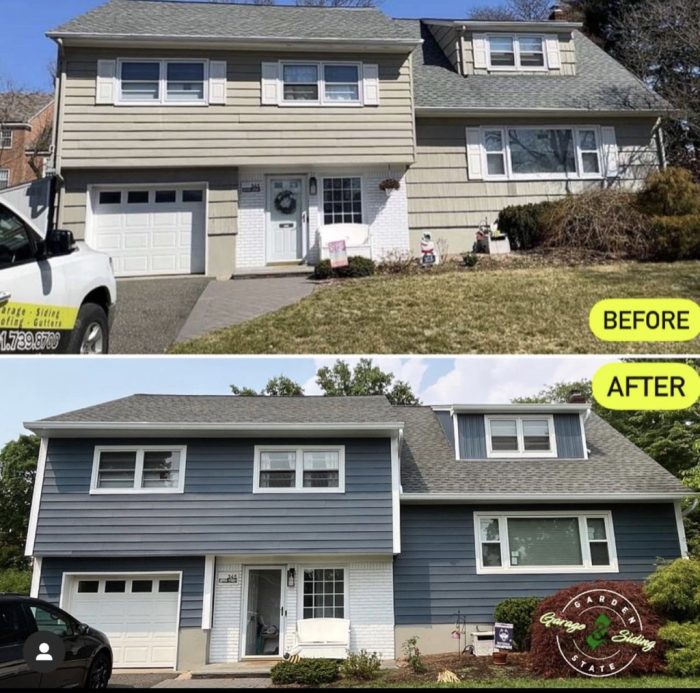
Source: gardenstategaragesiding.net
Choosing the right cedar siding and installing it properly can significantly enhance your home’s curb appeal and longevity. This section details the various types of cedar siding available and provides a guide to their installation, including crucial preparation steps.
Cedar Siding Types
Selecting the appropriate cedar siding depends on your aesthetic preferences, budget, and the overall style of your home. The following table summarizes the key characteristics of common types:
| Type | Description | Advantages | Disadvantages |
|---|---|---|---|
| Bevel Siding | Features a beveled edge, creating a shadow line that adds depth and texture. Often comes in various widths. | Classic look, relatively easy to install, affordable. | Can show imperfections more easily than other types. |
| Channel Siding | Characterized by a channel or groove running down the length of each board. | Provides a clean, modern look; good for hiding minor imperfections. | Can be more expensive than bevel siding; requires precise installation. |
| Clapboard Siding | Overlapping boards with a graduated width, creating a traditional look. | Durable, classic appearance, good weather resistance. | More labor-intensive to install than other types. |
| Shingle Siding | Individual pieces of cedar, often tapered, that are layered to create a textured surface. | Rustic and natural look; excellent weather protection. | Most expensive option; requires skilled installation. |
Installation Process Comparison: Bevel and Clapboard Siding
While both bevel and clapboard siding offer attractive options, their installation processes differ significantly.
Bevel siding installation is generally considered easier and faster. Tools required include a circular saw, measuring tape, level, hammer, nails, and a nail gun (optional). The process involves attaching furring strips to the wall framing, installing a moisture barrier, and then nailing the bevel siding directly to the furring strips, ensuring proper overlap and alignment.
Clapboard siding installation is more complex, requiring more precision and attention to detail due to the overlapping nature of the boards. In addition to the tools listed for bevel siding, you may need a siding gauge to maintain consistent overlap. The installation process involves similar steps to bevel siding, but the precise placement and overlapping of each board is crucial to achieve a professional finish. The use of a nail gun with appropriate settings for the thickness of the clapboard is highly recommended to prevent splitting.
Wall Preparation for Cedar Siding
Proper wall preparation is critical for successful cedar siding installation and the longevity of the finished product. This involves several key steps:
First, assess the existing wall for any damage, such as rot or insect infestation. Repair any damaged areas before proceeding. Next, install appropriate insulation to improve energy efficiency. Common types include fiberglass batts or rigid foam insulation. This step is crucial for maintaining a comfortable interior temperature and reducing energy costs.
Following insulation, a moisture barrier is essential to prevent water damage. This could be a polyethylene sheathing or a breathable house wrap. The chosen material should be carefully installed to ensure a continuous and airtight seal. Finally, install furring strips over the moisture barrier, creating a level surface for the cedar siding to be attached to. This also helps to provide proper ventilation behind the siding.
Cost and Budgeting: Cedar Siding Installers Near Me
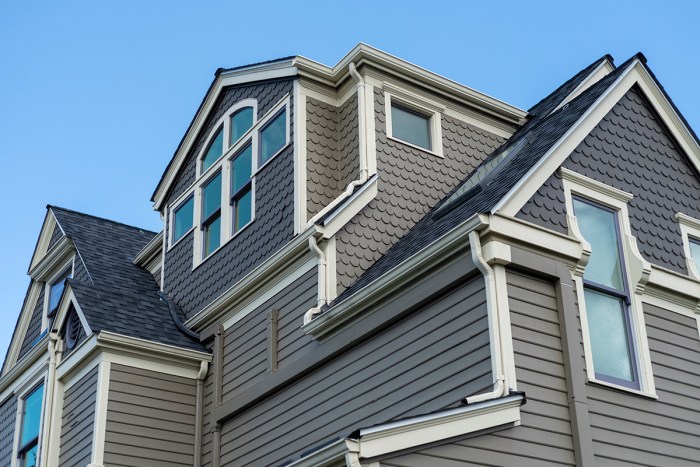
Source: integritywindowsandsiding.net
Cedar siding offers a beautiful and durable exterior for your home, but understanding the costs involved is crucial for planning your project effectively. This section breaks down the typical expenses, factors influencing the final price, and provides a sample budget to help you navigate the financial aspects of your cedar siding installation.
Accurate cost estimation requires considering several variables. While we can provide a general overview, it’s always best to obtain personalized quotes from multiple reputable cedar siding installers in your area.
Cost Breakdown
The total cost of cedar siding installation is typically comprised of three main components: materials, labor, and permits. Let’s examine each one individually.
- Materials: This includes the cedar siding itself (consider the grade and type, which significantly impacts cost), fasteners, underlayment, flashing, and any necessary trim pieces. Prices vary based on the quality and quantity of materials needed. Expect to pay anywhere from $6 to $15 per square foot for the cedar siding alone.
- Labor: Labor costs are influenced by the project’s complexity, the installer’s experience, and the prevailing local labor rates. Labor charges typically range from $3 to $8 per square foot, but can be higher for intricate designs or challenging installations.
- Permits: Building permits are necessary in most areas and are required before starting any work. The cost of permits varies by location and the scope of the project. Expect to pay a few hundred dollars, but it’s best to check with your local building department for accurate estimates.
Factors Influencing Overall Cost
Several factors influence the final cost of your cedar siding project. Understanding these factors allows for better budgeting and realistic expectations.
- House Size: The larger the house, the more siding material and labor are required, directly impacting the overall cost. A larger surface area translates to higher material and labor costs.
- Siding Type and Grade: Different types of cedar siding (e.g., bevel, clapboard, shingle) and grades (e.g., clear, #1, #2) have varying costs. Higher-grade cedar with fewer imperfections is more expensive. The thickness of the siding also plays a role; thicker boards are naturally more costly.
- Installation Complexity: Projects involving intricate designs, multiple angles, or extensive trim work generally require more labor, increasing the overall cost. Houses with complex architectural features will necessitate more time and skill from the installers, driving up labor expenses.
- Geographic Location: Labor and material costs vary by region. Areas with higher labor costs or limited access to cedar will result in a higher overall price.
Sample Budget
This sample budget illustrates the potential costs for a hypothetical 1500 square foot house. Remember, this is an estimate, and actual costs may vary. Consider this a starting point for your own budgeting.
| Expense Category | Cost per Square Foot | Total Cost (1500 sq ft) |
|---|---|---|
| Cedar Siding Materials | $10 | $15,000 |
| Labor | $5 | $7,500 |
| Permits | – | $500 |
| Underlayment & Flashing | $2 | $3,000 |
| Trim & Accessories | $1 | $1,500 |
| Total Estimated Cost | $18 | $27,500 |
Potential Savings Strategies: Choosing a less expensive grade of cedar, opting for a simpler design, and performing some prep work yourself (if you have the skills) can help reduce costs.
Warranty and Maintenance
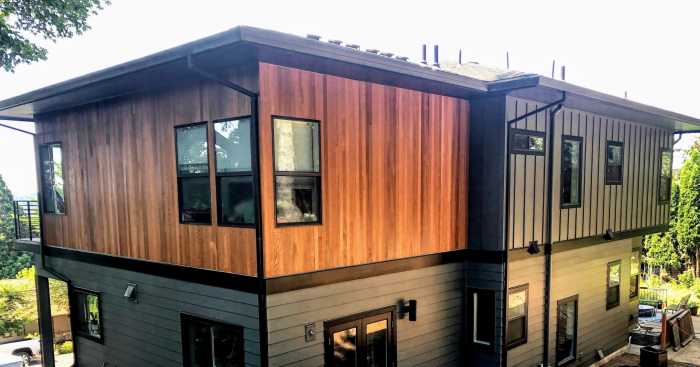
Source: josephketnerconstruction.com
Choosing a reputable cedar siding installer is crucial, and a significant factor in that decision should be the warranty they offer. A comprehensive warranty protects your investment and provides recourse should problems arise with the installation or materials. Understanding the warranty details before you commit to a project can save you significant time, money, and frustration down the line.
Warranties typically cover various aspects of the installation. For example, a common warranty provision might cover defects in workmanship for a period of one to two years. This means that if the installer makes a mistake during installation – like improperly attaching siding – they’re responsible for rectifying it within that timeframe. Material warranties are also common, often provided by the manufacturer of the cedar siding itself. These warranties typically cover defects in the wood itself, such as rot or warping, for a longer period, sometimes up to 20 years, depending on the manufacturer and the specific product. It’s essential to carefully review the specific terms and conditions of both the installer’s and manufacturer’s warranties to fully understand the coverage provided.
Warranty Provisions
A typical warranty will specify the duration of coverage, what is covered (workmanship, materials, or both), and what is excluded (e.g., damage caused by acts of God, improper maintenance). Some warranties might offer prorated coverage, meaning that the amount of reimbursement decreases over time. Others might be full replacement warranties, guaranteeing a complete replacement of faulty materials or work. Always obtain a written copy of the warranty and carefully review it before signing any contracts. Examples of specific warranty provisions might include: a 1-year warranty on labor, a 15-year warranty on the cedar siding material against rot and decay, or a 5-year warranty against water damage due to installation defects.
Cedar Siding Maintenance
Regular maintenance is key to extending the life of your cedar siding and maintaining its aesthetic appeal. Neglecting maintenance can lead to premature deterioration and costly repairs. The following maintenance tasks should be performed on a regular schedule.
Proper maintenance involves several key steps.
- Annual Inspection: A thorough visual inspection should be conducted annually to check for any signs of damage, such as cracks, loose boards, or insect infestation. Look for discoloration, warping, or areas where moisture might be accumulating.
- Cleaning: Clean your siding at least once a year, using a soft brush and a gentle cleaning solution. Avoid harsh chemicals that can damage the wood. A pressure washer can be used, but care must be taken to avoid damaging the siding.
- Caulking and Repair: Repair any cracks or gaps in the caulking around windows and doors to prevent water penetration. Replace any damaged or loose siding boards promptly.
- Pest Control: Regularly inspect for signs of insect infestation, such as termite damage or carpenter ant activity. Address any pest problems immediately to prevent widespread damage.
- Painting or Staining (Optional): While not strictly necessary, applying a protective coat of paint or stain can further enhance the longevity of your cedar siding and protect it from the elements. Follow manufacturer’s instructions carefully.
Potential Issues with Poor Installation
Poorly installed cedar siding can lead to a variety of problems, significantly impacting the longevity and appearance of your home’s exterior. Water damage is a primary concern. Improper flashing around windows and doors can allow water to penetrate behind the siding, leading to rot, mold, and mildew growth. You might visually notice swelling or discoloration of the siding in these areas. Furthermore, inadequate fastening can result in loose or detached siding, creating gaps that allow moisture to seep in. This can cause the wood to become waterlogged and eventually rot, leading to visible decay and structural damage. Uneven spacing between boards can also compromise the siding’s ability to shed water, leading to similar problems. You might see evidence of this in areas where water stains are noticeable, indicating water intrusion. In severe cases, the entire section of siding may need to be replaced.
Wrap-Up
Finding the perfect cedar siding installers near you involves careful research and consideration. By comparing quotes, reviewing customer testimonials, and understanding the nuances of different installation methods, you can confidently choose a professional who will deliver exceptional results. Remember to factor in the total cost, including materials, labor, and potential permits, and don’t hesitate to ask questions to ensure you’re comfortable with the chosen installer’s approach and warranty. Your new cedar siding will be a beautiful addition to your home for years to come!
General Inquiries
What’s the average lifespan of cedar siding?
With proper installation and maintenance, cedar siding can last 20-30 years or even longer.
Do I need a permit for cedar siding installation?
Most areas require permits for exterior home renovations. Check with your local building department.
How much does it cost to remove existing siding before installation?
Removal costs vary greatly depending on the type and condition of the existing siding and the size of the house. Get separate quotes for removal.
Can I install cedar siding myself?
While possible, it’s generally recommended to hire professionals. Improper installation can lead to costly repairs down the line.
What are the common warranty terms for cedar siding installation?
Warranties vary, but often cover defects in materials and workmanship for a specific period (e.g., 1-5 years).
Comments are closed.