Replacing Exterior Siding A Complete Guide
Replacing exterior siding is a significant home improvement project that can dramatically enhance your home’s curb appeal and protect it from the elements. This guide walks you through the entire process, from choosing the right siding material to selecting a reputable contractor, ensuring you’re well-equipped to make informed decisions every step of the way. We’ll cover various siding types, installation techniques, cost considerations, and essential maintenance tips to help you achieve a beautiful and long-lasting result.
Whether you’re tackling a DIY project or hiring professionals, understanding the nuances of siding replacement is crucial for a successful outcome. This guide aims to provide you with the knowledge and confidence to navigate this process effectively, resulting in a stunning transformation of your home’s exterior.
Types of Exterior Siding
Choosing the right exterior siding is a crucial decision impacting your home’s curb appeal, energy efficiency, and long-term maintenance. Different materials offer unique advantages and disadvantages, so understanding these differences is key to making an informed choice. This section will explore several popular siding options, comparing their lifespan, maintenance needs, and cost.
Siding Material Comparison
Let’s delve into the specifics of five common siding materials: vinyl, wood, fiber cement, metal, and brick. Each offers a distinct combination of aesthetics, durability, and price point.
| Material | Lifespan (Years) | Maintenance | Cost (per sq ft, approximate) |
|---|---|---|---|
| Vinyl | 20-40 | Low; occasional cleaning | $3-$8 |
| Wood | 20-50+ (depending on wood type and maintenance) | Medium to High; regular painting/staining, occasional repairs | $6-$15+ |
| Fiber Cement | 30-50+ | Low to Medium; occasional cleaning, repainting every 10-15 years | $8-$15+ |
| Metal | 40-75+ | Low; occasional cleaning | $10-$20+ |
| Brick | 75+ | Very Low; occasional cleaning and pointing | $15-$30+ |
Note: Cost estimates are highly variable and depend on factors like location, labor costs, and specific product choices.
Aesthetic Appeal and House Styles
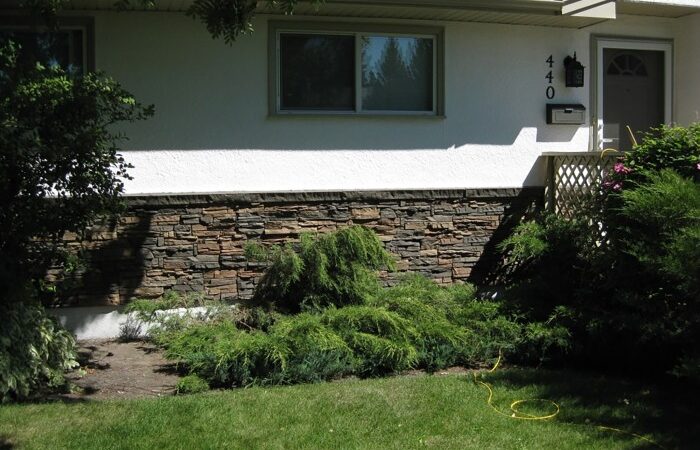
The visual impact of siding varies significantly depending on the material and the architectural style of the house. Imagine a Victorian home: The intricate detailing is beautifully complemented by wood siding, perhaps stained a dark, rich brown, highlighting the architectural flourishes. The texture of the wood adds depth and warmth, creating a classic, elegant look. In contrast, a sleek, modern home might feature metal siding in a clean, contemporary color like charcoal grey or a muted silver. The smooth, flat surface reflects light, emphasizing the home’s clean lines and minimalist design. A Craftsman-style bungalow might look charming with fiber cement siding, offering a durable and low-maintenance option that mimics the look of wood without the extensive upkeep. Vinyl siding, available in a wide array of colors and textures, can be a versatile choice for various house styles, although it might lack the visual richness of natural materials. Brick, with its inherent texture and timeless appeal, provides a robust and visually striking exterior for a wide range of architectural styles, from traditional to contemporary. The visual impact also depends on color choices. A light-colored siding can make a home appear larger and brighter, while darker colors create a more dramatic and intimate feel.
Siding Removal and Preparation
Replacing your exterior siding is a significant undertaking, but proper preparation is key to a successful and long-lasting result. This section focuses on safely removing your existing siding and preparing the underlying wall for the new installation. Remember, safety is paramount throughout this process.
Siding removal and wall preparation require careful attention to detail. Improper removal can damage the underlying sheathing, leading to increased costs and potential structural issues. Thorough preparation ensures a smooth and efficient installation of your new siding.
Safe Siding Removal Techniques
Removing existing siding involves several steps, starting with safety precautions. Always wear appropriate personal protective equipment (PPE), including safety glasses, gloves, and a dust mask to protect yourself from flying debris and harmful materials like asbestos (if present – have it tested professionally!). Begin by carefully removing any trim pieces around windows and doors. Use a pry bar or similar tool to gently loosen the siding, working from the bottom up to avoid damaging the remaining panels. For vinyl or aluminum siding, a utility knife can be helpful in scoring the seams before prying. For wood siding, you may need a reciprocating saw. Remember to work methodically and avoid excessive force to prevent damage to the underlying wall. Dispose of old siding responsibly, checking local regulations for proper disposal methods.
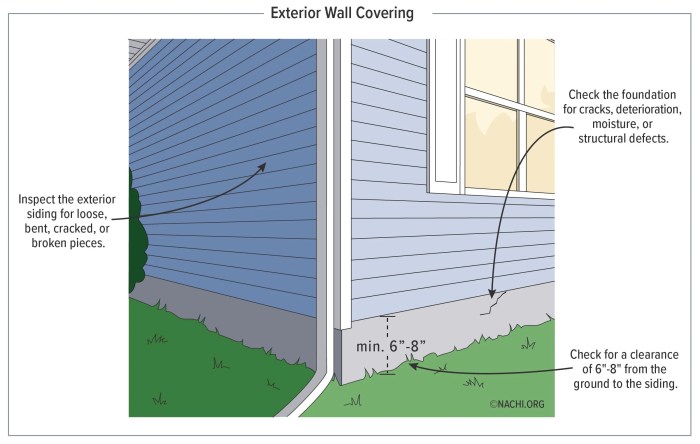
Wall Preparation and Moisture Management
Once the old siding is removed, inspect the underlying wall sheathing for damage. Repair any rotted or damaged wood with appropriate wood filler or replacement boards. Check for signs of moisture intrusion, such as water stains or mold. Address any moisture issues promptly, as this can lead to significant problems down the line. This may involve repairing damaged flashing, sealing gaps and cracks, or even replacing sections of the sheathing. Proper ventilation is crucial in preventing moisture buildup. Ensure adequate attic ventilation and consider installing a vapor barrier if necessary. A thorough cleaning of the wall is also recommended before installing the new siding.
Tools and Materials Checklist
Preparing for siding removal and wall preparation requires a range of tools and materials. Having everything on hand will streamline the process and minimize delays.
- Safety glasses
- Work gloves
- Dust mask
- Pry bar
- Utility knife
- Reciprocating saw (for wood siding)
- Hammer
- Screwdrivers (various sizes)
- Wood filler
- Caulk
- Replacement sheathing (if needed)
- Vapor barrier (if needed)
- Cleaning supplies (brush, soap, water)
- Drop cloths or tarps
- Ladder (if necessary)
Having a well-organized checklist will ensure you have all the necessary tools and materials on hand before starting the project. This will prevent costly delays and ensure a smooth and efficient process. Remember to always prioritize safety and carefully inspect the wall for any potential issues before beginning the installation of the new siding.
Siding Installation Methods

Source: genstone.com
Installing exterior siding correctly is crucial for a home’s curb appeal and protection from the elements. Different siding materials require different installation techniques, each with its own set of advantages and disadvantages. Understanding these methods is key to a successful siding project.
Overlapping Siding Installation
Overlapping is a common method, particularly for wood and vinyl siding. Each piece of siding is installed horizontally, overlapping the one below. This creates a protective barrier against moisture and wind. The degree of overlap varies depending on the material and manufacturer’s instructions. For example, vinyl siding typically has a specific overlap designed to allow for expansion and contraction. Advantages include relative ease of installation and cost-effectiveness. Disadvantages include potential for water penetration if not installed correctly, and a slightly less clean look compared to other methods. Proper nailing is critical to prevent gaps and ensure a secure fit.
Nailed Siding Installation
Nailed siding installation involves directly fastening siding to the sheathing using nails. This method is suitable for a variety of materials, including wood, fiber cement, and some types of metal siding. The nails are typically driven into pre-drilled holes to prevent splitting, especially with wood siding. The spacing and type of nail depend on the siding material and the manufacturer’s recommendations. Advantages include a secure and robust installation. Disadvantages include the potential for nail holes to be visible and the risk of damaging the siding if nails are improperly placed.
Interlocking Siding Installation
Interlocking siding, frequently used with vinyl and some composite materials, features a system where each piece connects to the next, creating a tight, seamless seal. This eliminates the need for overlapping, resulting in a cleaner, more uniform appearance. The interlocking design also enhances weather resistance. Advantages include a cleaner look and superior weather protection. Disadvantages can include higher initial cost and potentially more challenging installation, requiring precise alignment and fitting.
Cutting and Fitting Siding Around Windows and Doors
Cutting and fitting siding around openings requires precision. Accurate measurements are crucial. J-channels, L-channels, and other trim pieces are used to create a neat and watertight finish. These trim pieces are installed first, creating a frame for the siding to fit into. The siding is then carefully cut to fit, ensuring a snug and weatherproof seal. Using a sharp utility knife or a siding cutter makes clean, precise cuts easier. Caulk or sealant should be applied to all joints to further enhance weather resistance. For intricate cuts, consider using a coping saw or jigsaw for better control.
Vinyl Siding Installation: A Step-by-Step Guide
1. Preparation: Ensure the sheathing is properly prepared and any necessary repairs are made.
2. Flashing Installation: Install flashing around windows and doors to prevent water penetration. Flashing should extend beyond the opening and overlap the siding.
3. Starter Strip: Install a starter strip along the bottom of the wall to provide a level base for the first row of siding.
4. Siding Installation: Begin installing the siding panels, overlapping them according to manufacturer instructions. Use appropriate nails and spacing.
5. J-Channel and L-Channel Installation: Install J-channels and L-channels around windows and doors.
6. Sealant Application: Apply sealant to all joints and seams to prevent water leakage.
7. Finishing: Install the final pieces of siding and trim. Inspect the installation for any gaps or imperfections.
Cost Considerations: Replacing Exterior Siding
Source: omnihomeideas.com
Replacing your exterior siding is a significant investment, and understanding the cost factors is crucial for budgeting and planning. The total expense varies widely depending on several key variables, including the type of siding chosen, the size and complexity of your home, labor costs in your region, and any unforeseen issues discovered during the project. This section will break down the cost components to help you create a realistic budget.
Material Costs Comparison
Different siding materials come with vastly different price tags. Vinyl siding, for example, is generally the most affordable option, offering a balance between cost and durability. Fiber cement siding provides superior durability and fire resistance but commands a higher price. Wood siding, particularly premium varieties like cedar or redwood, is often the most expensive, reflecting its aesthetic appeal and longevity. Metal siding, while durable and low-maintenance, also sits in the mid-to-high price range. These material costs are typically quoted per square foot, and it’s essential to get multiple quotes to compare pricing. For example, vinyl siding might range from $3 to $8 per square foot, while fiber cement could cost $10 to $20 or more. Wood siding prices can vary even more drastically, from $10 to $30+ per square foot depending on the wood type and quality.
Labor Cost Estimates
Labor costs represent a substantial portion of the total siding replacement expense. The hourly rate for skilled siding installers varies by location and the contractor’s experience. It’s common to see labor costs ranging from $30 to $75 per hour, or even more in some areas. The total labor cost is directly tied to the project’s size and complexity. A larger home with intricate details or difficult-to-access areas will naturally require more labor hours, thus increasing the overall expense. For instance, a 1500 sq ft home might require 200-300 labor hours for siding replacement, whereas a 3000 sq ft home could easily double that.
Budget Breakdown Example
Let’s consider a hypothetical 1,500 square foot home requiring vinyl siding replacement. A realistic budget breakdown might look like this:
| Item | Cost |
|---|---|
| Materials (Vinyl Siding) | $3,000 – $6,000 |
| Labor | $6,000 – $18,000 |
| Permits and Inspections | $500 – $1,000 |
| Waste Removal | $200 – $500 |
| Contingency (10-15%) | $1,000 – $3,000 |
| Total Estimated Cost | $10,700 – $28,500 |
The contingency accounts for unforeseen issues like rotted wood requiring extra repair, unexpected material costs, or adjustments due to site conditions. This example demonstrates the wide range possible. A more expensive siding material or a complex home design would significantly increase the total cost.
Factors Influencing Total Cost
Several factors influence the final cost beyond material and labor. The size of your home is a primary driver, as larger homes naturally require more materials and labor. The complexity of the home’s design also matters; homes with many dormers, gables, or intricate trim details will be more time-consuming and expensive to side. The condition of the existing siding also plays a role; extensive damage or rot will add to the cost of repairs and removal. Location also impacts the price, as labor rates and material availability can vary regionally. Finally, the chosen contractor’s reputation and experience influence the final cost; experienced contractors often charge more but may offer better quality and efficiency. For instance, a home with significant water damage necessitating extensive repairs before new siding can be installed will dramatically increase the overall project cost.
Maintenance and Repair
Proper siding maintenance is crucial for extending its lifespan and protecting your home. Regular inspections and timely repairs prevent minor issues from escalating into costly replacements. Different siding materials require slightly different care, but the overall principles remain consistent: keeping it clean, dry, and free from damage.
Regular maintenance not only saves you money in the long run but also maintains your home’s curb appeal. Neglecting maintenance can lead to structural damage, mold growth, and reduced energy efficiency. This section details the specific care needs of common siding types and provides guidance on addressing common problems.
Siding Material-Specific Maintenance
Different siding materials have unique maintenance requirements. For example, wood siding needs regular painting or staining to prevent rot and insect infestation, while vinyl siding primarily requires occasional cleaning. Understanding these differences is key to effective maintenance.
- Wood Siding: Annual cleaning with a mild detergent solution and a soft brush is essential. Inspect for cracks, rot, and insect damage. Repainting or restaining every 3-5 years is typically necessary, depending on the climate and paint quality. Consider applying a wood preservative to prevent rot and insect infestation.
- Vinyl Siding: Cleaning is usually sufficient. Use a hose and a soft brush to remove dirt and debris. Avoid harsh chemicals, which can damage the vinyl. Inspect for cracks or damage, and repair as needed using vinyl patching kits.
- Fiber Cement Siding: This durable material requires minimal maintenance. Regular cleaning with a hose and brush is sufficient. Inspect for cracks or damage, and repair using appropriate patching compounds. Its resistance to moisture and insects is a key advantage.
- Metal Siding: Metal siding is highly durable and requires minimal maintenance. Regular cleaning with a hose and brush is generally sufficient. Inspect for dents or scratches, and repair as needed using specialized metal repair kits. Look for signs of rust and address promptly.
Identifying and Repairing Common Siding Problems
Early detection and prompt repair of siding problems are crucial to prevent further damage. Cracks, dents, and water damage are common issues that, if left unaddressed, can compromise the structural integrity of your home and lead to costly repairs.
- Cracks: Small cracks can often be repaired with caulking or patching compounds appropriate for the siding material. Larger cracks may require replacing the damaged section of siding.
- Dents: Minor dents in metal or vinyl siding can sometimes be gently pushed back into place. More significant dents may require replacement of the damaged section.
- Water Damage: Water damage can manifest as discoloration, rot (in wood siding), or swelling. Address water damage promptly to prevent mold growth and structural damage. This often involves repairing damaged flashing, caulking, or replacing damaged siding sections.
Routine Siding Inspection and Maintenance Schedule
A regular inspection schedule helps catch problems early, minimizing repair costs and extending siding lifespan. Consider this sample schedule, adjusting it based on your siding material and climate:
| Task | Frequency |
|---|---|
| Visual inspection for cracks, dents, and damage | Twice yearly (spring and fall) |
| Cleaning (appropriate for siding type) | Annually or as needed |
| Caulking and sealant inspection and repair | Annually |
| Major repairs (e.g., replacing damaged sections) | As needed |
| Repainting/re-staining (wood siding) | Every 3-5 years |
Environmental Impact
Choosing exterior siding involves more than just aesthetics and cost; it significantly impacts the environment. The entire lifecycle of siding – from raw material extraction and manufacturing to installation, maintenance, and eventual disposal – contributes to its overall environmental footprint. Understanding these impacts helps homeowners make informed, eco-conscious decisions.
The environmental impact of different siding materials varies considerably. Manufacturing processes consume energy and resources, and some materials generate more waste than others. Disposal methods also play a crucial role, with some materials being easily recycled while others end up in landfills. Furthermore, the energy efficiency of the siding itself affects a home’s overall energy consumption and carbon footprint.
Manufacturing Processes and Resource Consumption
The production of various siding materials requires different levels of energy and resources. For example, vinyl siding, while readily available and affordable, is derived from petroleum, a non-renewable resource. Its manufacturing process often involves the release of greenhouse gases. In contrast, wood siding, especially sustainably harvested wood, has a lower carbon footprint if sourced responsibly. However, wood requires processing, potentially involving chemical treatments that can have environmental consequences. Fiber cement siding, a composite material, utilizes cement, sand, and cellulose fibers, all relatively abundant resources; however, its manufacturing process still consumes energy. Metal siding, often made from recycled aluminum or steel, has a lower embodied energy compared to vinyl, but its initial production requires significant energy input.
Siding Material Disposal and Recycling, Replacing exterior siding
Disposal of siding materials poses another environmental challenge. Vinyl siding is not readily biodegradable and often ends up in landfills. While some recycling programs exist, they are not widely available. Wood siding, if untreated, can potentially decompose naturally, but treated wood may contain chemicals that can leach into the soil. Fiber cement siding can be crushed and used as aggregate in construction projects, offering a degree of recyclability. Metal siding, due to its recyclability, presents a more environmentally friendly end-of-life scenario. Proper disposal and recycling practices are crucial to minimizing the environmental impact of siding at the end of its lifespan.
Energy Efficiency of Siding Materials
Different siding materials offer varying levels of insulation, directly impacting a home’s energy efficiency. Highly insulating siding materials, such as fiber cement and certain types of insulated vinyl siding, can reduce heating and cooling costs, thereby lowering a home’s carbon footprint. Conversely, less-insulating materials may lead to increased energy consumption. The R-value, a measure of a material’s thermal resistance, is a key indicator of its insulating capacity. For example, a higher R-value indicates better insulation and reduced energy use. Proper installation techniques also play a crucial role in maximizing the energy-saving potential of any siding material.
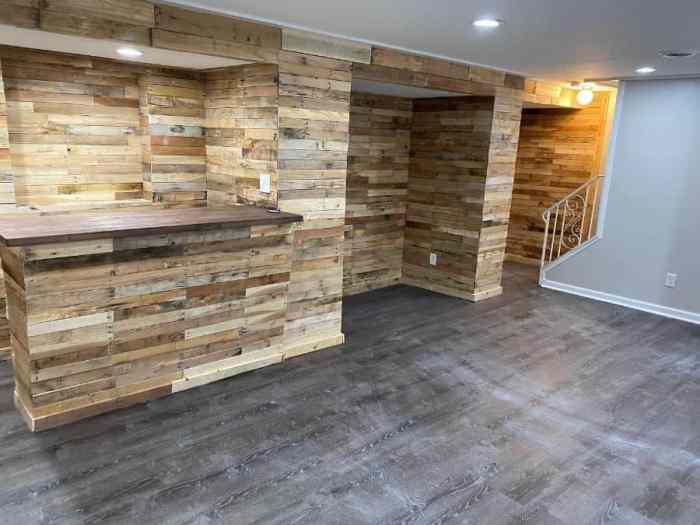
Sustainable and Eco-Friendly Siding Choices
Homeowners seeking eco-friendly options can consider several sustainable siding choices. Recycled materials, such as recycled plastic lumber or reclaimed wood, minimize resource depletion. Siding made from rapidly renewable resources, like bamboo, offers a sustainable alternative. Additionally, choosing locally sourced materials reduces transportation emissions. Finally, selecting siding with high recycled content and a high R-value contributes to both environmental and economic sustainability. For example, a home utilizing siding with a high percentage of recycled content and excellent insulation can significantly reduce its long-term energy costs and carbon emissions.
Choosing a Contractor
Source: nextluxury.com
Replacing your exterior siding is a significant investment, so choosing the right contractor is crucial for a successful project. A poorly chosen contractor can lead to shoddy workmanship, cost overruns, and protracted timelines. This section will guide you through the process of selecting a qualified and reputable professional.
Finding a reliable siding contractor requires careful research and due diligence. Don’t rush the process; your siding protects your home for years to come. Consider factors beyond just price to ensure a quality outcome.
Contractor Qualifications and Reputation
Before contacting any contractors, start by gathering referrals from friends, family, or neighbors who have recently had siding work done. Online reviews on sites like Yelp, Angie’s List, or HomeAdvisor can also provide valuable insights into a contractor’s reputation. Look for consistent positive feedback and a history of completing projects on time and within budget. Verify licensing and insurance; a reputable contractor will readily provide proof of both. Check with your state’s contractor licensing board to confirm their credentials are up-to-date and valid. A licensed and insured contractor protects you from potential liability issues should accidents occur during the project.
Questions to Ask Potential Contractors
Asking the right questions is essential to assess a contractor’s suitability for your project. Thorough questioning demonstrates your commitment to making an informed decision.
- Years of experience in siding installation and the specific type of siding you’ve chosen.
- Their process for handling permits and inspections.
- Details of their warranty and guarantees on both workmanship and materials.
- A detailed breakdown of the project timeline, including start and completion dates.
- References from previous clients, including contact information for verification.
- Their approach to managing unexpected issues or changes during the project.
- Whether they employ subcontractors and, if so, how they oversee their work.
- Their payment schedule and policies regarding change orders.
Obtaining Multiple Bids and Reviewing Contracts
Getting at least three bids from different contractors is standard practice. This allows for comparison of pricing, timelines, and proposed methods. Don’t base your decision solely on price; consider the overall value offered, including experience, reputation, and warranty.
Before signing any contract, carefully review all terms and conditions. Ensure that the contract clearly Artikels the scope of work, payment schedule, materials to be used, warranty details, and dispute resolution procedures. If anything is unclear or seems unreasonable, don’t hesitate to ask for clarification. Consider having a lawyer review the contract before signing, especially for large projects. A well-written contract protects both you and the contractor. For example, a contract should clearly specify the type and quantity of siding materials, labor costs, and any contingency plans for unexpected weather delays.
Ultimate Conclusion
Source: cloudinary.com
Ultimately, replacing your exterior siding is an investment that pays off in both aesthetic appeal and long-term protection for your home. By carefully considering the factors Artikeld in this guide – from material selection and installation techniques to cost analysis and maintenance strategies – you can ensure a successful project that enhances your home’s value and beauty for years to come. Remember to choose a reputable contractor and plan for the unexpected, and enjoy the process of transforming your home’s exterior!
FAQ Section
How long does exterior siding replacement typically take?
The timeframe varies greatly depending on the size of your home, the type of siding, and the complexity of the project. Expect anywhere from a few days to several weeks.
Can I replace siding myself?
While possible for some simpler siding types, replacing siding is a challenging project requiring specific skills and tools. For larger or more complex projects, hiring a professional is recommended.
What permits are needed for siding replacement?
Permit requirements vary by location. Check with your local building department to determine if permits are necessary before starting the project.
How do I dispose of old siding responsibly?
Many municipalities have specific guidelines for disposing of construction waste. Check your local waste management services for proper disposal methods and potential recycling options.
What’s the best time of year to replace siding?
Spring and fall generally offer the best weather conditions for siding replacement, avoiding extreme heat or cold.
Comments are closed.